Blog

  • Easy BFF 2 Person Yoga Poses: 7 Fun Ways To Bond While Stretching

    Easy BFF 2 Person Yoga Poses: 7 Fun Ways To Bond While Stretching

    Looking to strengthen your friendship while getting fit? Explore these easy bff 2 person yoga poses that combine fun with flexibility. Perfect for beginners seeking connection through movement. Try today!

    Main Topic Overview

    Easy BFF 2 Person Yoga Poses

    Friendship and fitness make a powerful combination. According to a recent study by the American Psychological Association, exercising with a friend increases motivation by up to 40% and enhances enjoyment of physical activities. Easy bff 2 person yoga poses offer the perfect opportunity to strengthen both your body and your relationship simultaneously. These accessible partner poses don’t require advanced yoga skills—just a willing friend and an open mind.

    Partner yoga dates back centuries in traditional practice but has gained immense popularity in recent years, with Instagram posts featuring friendship yoga poses increasing by 78% since 2020. What makes these poses particularly special is their ability to build trust, improve communication, and create memorable experiences between friends, all while providing genuine physical benefits like improved flexibility, balance, and core strength.

    Whether you’re looking for a new way to connect with your bestie or seeking to add variety to your wellness routine, these seven beginner-friendly partner poses are designed to be accessible, fun, and effective for friendship bonding.

    Key Points

    Partner yoga offers unique advantages that solo practice can’t match. Here’s what makes easy bff 2 person yoga poses particularly valuable:

    1. Dual Support System: Unlike solo yoga, where you rely solely on your own strength and balance, partner poses let you share the physical burden, making challenging positions more accessible.
    2. Enhanced Stretching: With a partner’s gentle assistance, you can achieve deeper stretches than possible alone, increasing flexibility without forcing movements.
    3. Built-in Accountability: Research shows that workout partners increase exercise adherence by 78%. When your BFF is counting on you, you’re more likely to show up consistently.
    4. Communication Development: These poses require verbal and non-verbal communication, strengthening your ability to express needs and respond to feedback—skills that benefit your friendship beyond the yoga mat.
    5. Trust Building: Physical support exercises naturally build trust as you literally lean on each other, creating a foundation of reliability that transfers to other aspects of your friendship.
    6. Laughter Therapy: Partner yoga often leads to unexpected giggles and shared humor, releasing endorphins that strengthen emotional bonds while reducing stress hormones.

    Detailed Explanation

    Pose 1: Double Downward Dog

    This pose begins with one friend in traditional downward dog position. The second person carefully steps forward, placing hands on the floor, and walks feet up onto the first person’s lower back, creating a stacked effect.

    Key technique tips:

    • The base partner should spread fingers wide and engage core muscles for stability
    • The top partner should align shoulders over wrists and distribute weight evenly
    • Both partners should communicate constantly—ask “How does this feel?” and respond honestly
    • Hold for 3-5 deep breaths before carefully dismounting

    This pose builds core strength for both participants while teaching weight distribution and balance. For beginners, try practicing near a wall for additional support.

    Pose 2: Seated Partner Twist

    Sit back-to-back with legs crossed. Inhale together, lengthening spines, then exhale as you both twist in opposite directions. Place your right hand on your partner’s left knee and left hand on your right knee (your partner mirrors this position).

    Key technique tips:

    • Maintain tall, aligned spines throughout the twist
    • Breathe synchronously—inhale to lengthen, exhale to deepen the twist
    • Focus on rotating from the lower ribs, not forcing with arms
    • Hold for 5-7 breaths, then switch sides

    This gentle detoxifying twist massages internal organs while creating a beautiful metaphor for how friends can move in different directions while still supporting each other.

    Pose 3: Forward Fold to Back Bend

    Stand facing each other, about arm’s length apart. Grasp each other’s wrists firmly. One partner folds forward with straight legs while the other leans back into a supported back bend.

    Key technique tips:

    • Establish a firm grip before beginning the movement
    • Forward-folding partner keeps legs active and core engaged
    • Back-bending partner drops head back only if neck feels comfortable
    • Communicate readiness before switching positions
    • Begin with shallow movements, progressively deepening with practice

    This complementary pose teaches the beauty of give-and-take in relationships—when one friend needs support, the other provides a counterbalance.

    Pose 4: Double Boat Pose

    Sit facing each other with knees bent and feet flat on the floor. Grasp each other’s wrists or hands, then simultaneously lift feet off the ground, bringing soles together in mid-air while balancing on sitting bones.

    Key technique tips:

    • Start with bent knees before attempting to straighten legs
    • Engage core muscles instead of pulling hard on arms
    • Find equal tension—neither person should be working significantly harder
    • Smile through the challenge to release tension in facial muscles
    • Hold for 3 breaths initially, gradually building to 30 seconds

    This pose builds remarkable core strength while creating a visual representation of friendship equilibrium—both giving equal effort for mutual benefit.

    Pose 5: Partner Tree Pose

    Stand side-by-side, touching shoulders. Each partner places outside foot on inside calf or thigh of standing leg (never on knee). Link inside arms and extend outside arms upward like branches.

    Key technique tips:

    • Focus gaze on a non-moving object to maintain balance
    • Press into each other’s shoulders for mutual support
    • If balancing is difficult, try practicing near a wall initially
    • Breathe steadily to maintain stability
    • Hold for 5-8 breaths before switching sides

    This pose beautifully symbolizes how friends help each other stand strong through life’s challenges.

    Practical Applications

    Easy bff 2 person yoga poses extend beyond casual practice sessions—they have diverse applications:

    Morning Energizer: Replace your coffee catch-ups with a 15-minute partner yoga flow to start the day with energy and connection.

    Stress Relief Sessions: Research shows that social connection combined with gentle movement reduces cortisol levels by up to 23%. Schedule partner yoga specifically during high-stress periods.

    Conflict Resolution Tool: When tension arises between friends, physical cooperation through partner poses can reset negative patterns and facilitate harder conversations.

    Travel Companion Activity: These poses require minimal space and no equipment, making them perfect for hotel rooms or beach vacations to maintain your wellness routine together.

    Social Media Content Creation: Create memorable photo opportunities that celebrate friendship while inspiring others to try wellness activities together.

    Benefits and Advantages

    The advantages of regular practice extend far beyond the physical:

    Physical Benefits:

    • Increased flexibility (20-30% improvement within 8 weeks of regular practice)
    • Enhanced balance and coordination
    • Improved posture through mutual alignment feedback
    • Core strengthening through stabilization challenges

    Emotional Benefits:

    • Reduced anxiety through physical touch and connection
    • Increased oxytocin production (the “bonding hormone”)
    • Shared endorphin release creating positive associations
    • Mutual accomplishment generating confidence

    Relationship Benefits:

    • Development of nonverbal communication skills
    • Creation of unique shared experiences and memories
    • Establishment of healthy physical boundaries
    • Practice in giving and receiving constructive feedback

    Common Challenges and Solutions

    Challenge: Balance Difficulties
    Solution: Start by practicing near a wall or stable furniture piece for support. Focus on core engagement rather than perfecting poses. Remember that wobbling is normal—even experienced yogis lose balance regularly!

    Challenge: Height or Weight Differences
    Solution: Adapt poses by adjusting hand positions or limb placement. The taller partner typically serves as the base in stacked poses. Remember that different body types create unique advantages for various poses.

    Challenge: Trust Issues
    Solution: Begin with poses that require minimal weight-bearing. Build confidence gradually with clear communication. Establish a safe word (like “pause”) that either person can use if feeling uncomfortable.

    Challenge: Uneven Flexibility Levels
    Solution: Focus on poses that accommodate different flexibility levels without comparison. Use props like yoga straps to bridge physical differences. Remember that yoga is about personal progress, not competition.

    Challenge: Giggles and Concentration
    Solution: Embrace laughter as part of the experience—it releases tension! Set an intention at the beginning of each practice to balance fun with focus, allowing both to coexist.

    Best Practices

    Preparation Guidelines:

    • Practice on an empty stomach (1-2 hours after eating)
    • Wear comfortable, non-restrictive clothing
    • Use a double-width yoga mat or place two mats side by side
    • Remove jewelry or accessories that might catch or scratch
    • Set phones to “do not disturb” to maintain connection

    Safety Considerations:

    • Always warm up individually for 5-7 minutes before partner poses
    • Communicate continuously about comfort and sensations
    • Enter and exit poses slowly and mindfully
    • Respect each other’s physical limitations without judgment
    • Listen to your body’s signals over aesthetic goals

    Practice Development:

    • Begin with 10-15 minute sessions, gradually building duration
    • Master 2-3 poses before adding new challenges
    • Record progress through photos or journal entries
    • Rotate who leads the practice to balance relationship dynamics
    • Schedule regular sessions for progressive improvement

    Conclusion

    Easy bff 2 person yoga poses offer a unique blend of physical wellness and relationship nurturing that few activities can match. By literally supporting each other’s bodies, you create a beautiful metaphor for emotional support while gaining tangible health benefits. The seven poses outlined here provide an accessible entry point for friends of any fitness level to explore this rewarding practice.

    The beauty of partner yoga lies in its inherent lessons—learning to communicate clearly, building mutual trust, finding balance together, and creating space for both laughter and focus. These are the same qualities that strengthen friendships off the mat.

    Ready to transform your friendship through movement? Grab your bestie, clear some floor space, and try these poses today. Remember that perfection isn’t the goal—connection is. Your friendship deserves this investment of time and energy, and your bodies will thank you for the mindful movement.

    FAQs

    Q: Do we need previous yoga experience to try these partner poses?
    A: Not at all! These seven poses were specifically selected for beginners. Focus on communication and enjoyment rather than perfect alignment. Previous yoga experience can help but isn’t necessary.

    Q: How often should we practice together for best results?
    A: Even once weekly practice shows benefits. Ideally, aim for 2-3 sessions per week of 15-30 minutes each for noticeable improvements in both physical flexibility and relational dynamics.

    Q: Can people with significant height or weight differences still practice these poses?
    A: Absolutely! The beauty of partner yoga is its adaptability. You may need to modify hand positions or adjust alignment, but different body types often create complementary advantages for various poses.

    Q: What if we keep falling or can’t hold the poses?
    A: Falling and wobbling are normal parts of the learning process! Keep sessions playful, take breaks when needed, and remember that even “failed” attempts build coordination and communication skills that make future practices more successful.

    Q: Can these poses help if we’re experiencing friendship tension?
    A: Yes, physical cooperation often bypasses verbal defensiveness. The necessity of working together creates a shared goal that can reset negative patterns and open communication channels. Just ensure both friends are willing participants.

    Q: Do we need special equipment for partner yoga?
    A: No specialized equipment is required. A non-slip surface (yoga mat preferably) and comfortable clothing are all you need. Props like blocks or straps can be helpful but aren’t essential for beginners.

    Q: How do we know if we’re doing the poses correctly?
    A: Focus on these indicators of good technique: steady comfortable breathing, absence of sharp pain, balanced effort between partners, and sustainable positioning. Taking occasional photos or videos can help assess alignment, or consider booking one session with a qualified yoga instructor for personalized guidance.

  • 6 Week Plan Ozempic Weight Loss Results: How 10 Pounds Changed Me

    6 Week Plan Ozempic Weight Loss Results: How 10 Pounds Changed Me

    Are you struggling with weight loss and considering Ozempic as a potential solution? Like many Americans battling obesity and weight-related health issues, I found myself researching medication-assisted weight loss options after years of frustrating yo-yo dieting. My journey with 6 week plan ozempic weight loss results transformed not just my body, but my entire approach to health and wellness. In this comprehensive guide, I’ll share my personal experience losing 10 pounds over six weeks while using Ozempic, along with evidence-based insights that might help you determine if this path is right for you.

    According to recent clinical data, Ozempic (semaglutide) users typically experience 5-10% body weight reduction within the first three months of treatment when combined with lifestyle modifications. My own 6 week plan ozempic weight loss results fell right within this expected range, providing me with the momentum I needed to continue my health journey beyond the initial phase.

    Main Topic Overview

    6 week plan Ozempic weight loss results

    Ozempic (semaglutide) was originally developed for Type 2 diabetes management but has gained significant popularity as a weight loss medication. The FDA approved a higher-dose version of semaglutide (Wegovy) specifically for weight management in 2021, revolutionizing medical weight loss approaches. The medication works by mimicking the hormone GLP-1, which regulates appetite and food intake by signaling fullness to the brain.

    My personal six-week Ozempic journey resulted in a 10-pound weight loss, which represents approximately 5% of my starting body weight. This aligns with clinical study findings where participants lost an average of 15% of their body weight over a longer period (typically 68 weeks). The most noticeable changes during my six-week plan included reduced hunger, decreased cravings for high-calorie foods, and a natural tendency to consume smaller portions.

    Key Points

    Week-by-Week Breakdown of My Experience

    Week 1: Started with the lowest dose (0.25mg). Experienced mild nausea that subsided after 2-3 days. Lost 1.5 pounds, likely water weight.

    Week 2: Noticed significant appetite suppression. Calories naturally dropped by about 500 daily without feeling deprived. Lost another 2 pounds.

    Week 3: Dose increased to 0.5mg after consultation with my doctor. Experienced one day of moderate nausea but quickly adapted. Energy levels improved as I incorporated light walking.

    Week 4: Developed more consistent eating patterns, focusing on protein-rich foods that kept me satisfied longer. Weight loss of 2.3 pounds this week.

    Week 5: First noticed visible changes in how clothes fit. Started a structured exercise routine (30-minute walks five times weekly). Lost 1.8 pounds.

    Week 6: Completed the six-week mark with a total loss of 10 pounds. Improved blood pressure readings (dropped from 135/85 to 125/78) and decreased waist circumference by 1.5 inches.

    Detailed Explanation

    How Ozempic Works for Weight Loss

    Ozempic functions differently from traditional weight loss medications. As a GLP-1 receptor agonist, it slows gastric emptying (making you feel fuller longer) and directly impacts your brain’s appetite control centers. This dual action creates what many users describe as “food indifference” — you simply think less about eating.

    During my six-week journey, I noticed three distinct phases:

    1. Adjustment Phase (Weeks 1-2): My body adapted to the medication. Some mild side effects occurred as my digestive system adjusted.
    2. Stabilization Phase (Weeks 3-4): Food cravings diminished significantly. I naturally gravitated toward more nutritious options without the usual internal battle.
    3. Routine Establishment (Weeks 5-6): New eating patterns became habitual. Portion control felt intuitive rather than forced.

    Recent research from the University of Pennsylvania suggests that these behavioral changes may persist after discontinuation of the medication if users establish solid lifestyle habits during treatment. This aligns with my experience of developing more mindful eating practices that I’ve maintained beyond the initial six weeks.

    Practical Applications

    Creating an Effective 6-Week Ozempic Plan

    Based on my experience and medical guidance, here’s a practical framework for maximizing Ozempic weight loss results over six weeks:

    Medical Oversight: Begin with a thorough consultation with a healthcare provider who can determine appropriate dosing and monitor your progress.

    Nutritional Strategy: Focus on protein-rich, nutrient-dense foods that support satiety. I found that aiming for 25-30g of protein per meal helped maximize the appetite-suppressing effects of Ozempic.

    Meal Structure: Small, frequent meals worked better than three large ones. A typical day included:

    • Breakfast: Greek yogurt with berries and nuts
    • Lunch: Large salad with lean protein
    • Afternoon snack: Apple with string cheese
    • Dinner: Palm-sized protein with vegetables and small portion of complex carbs

    Hydration: Drinking 2-3 liters of water daily helped manage constipation (a common side effect) and enhanced the feeling of fullness.

    Physical Activity: Starting with gentle movement in weeks 1-2 and gradually building to 150 minutes of moderate activity weekly by week 6.

    Tracking Tools: Using a simple food and symptom journal helped identify patterns and optimize my approach.

    Benefits and Advantages

    My personal experience with Ozempic revealed benefits beyond just weight loss:

    Metabolic Improvements: My fasting blood sugar dropped from 110 mg/dL to 92 mg/dL within six weeks.

    Reduced Inflammation: Chronic joint pain decreased significantly by week 5.

    Psychological Freedom: Perhaps most valuable was the mental space created by not constantly thinking about food or feeling hungry.

    Sustainable Approach: Unlike previous diet attempts, I didn’t experience the extreme hunger or deprivation that typically led to rebound weight gain.

    Improved Sleep Quality: By week 4, I noticed deeper, more restorative sleep patterns according to my fitness tracker data.

    Enhanced Energy: Initially, I experienced some fatigue, but by week 3, my energy levels improved noticeably as my body adapted.

    Common Challenges and Solutions

    Side Effect Management

    Nausea: Experienced by approximately 44% of users in clinical trials, I found that taking my injection at night and consuming ginger tea helped minimize this effect.

    Constipation: Increasing fiber gradually (rather than suddenly) and maintaining proper hydration effectively managed this issue for me.

    Fatigue: Temporary during the first two weeks; addressed by ensuring adequate protein intake and proper electrolyte balance.

    Food Aversions: Some foods suddenly seemed unappetizing. I overcame this by focusing on nutrient density rather than variety initially.

    Plateau Strategies

    Although my six-week period showed consistent losses, research indicates plateaus commonly occur around weeks 8-12. Preparation strategies include:

    • Adjusting protein intake up slightly
    • Introducing resistance training
    • Temporarily increasing daily steps
    • Consulting with your doctor about potential dosage adjustments

    Best Practices

    Based on my experience and consultation with healthcare providers, these best practices can optimize your six-week Ozempic weight loss results:

    1. Administer Injections Consistently: Same day and time each week helps maintain stable blood levels.
    2. Prioritize Protein: Aim for 1.2-1.6g per kilogram of ideal body weight daily.
    3. Strategic Supplementation: Consider a high-quality multivitamin and omega-3s, as reduced food intake may impact nutrient absorption.
    4. Mindful Movement: Focus on enjoyable physical activities rather than intense exercise initially.
    5. Monitor Beyond Scale Weight: Track measurements, energy levels, and how clothes fit for a more comprehensive progress assessment.
    6. Prepare for Social Situations: Have strategies ready for dining out and social events where food pressures might arise.
    7. Address Emotional Eating: Use the appetite suppression effect as an opportunity to develop non-food coping mechanisms for stress or emotional triggers.

    Conclusion

    My six-week journey with Ozempic resulted in a 10-pound weight loss that has fundamentally shifted my relationship with food and physical activity. The medication provided the physiological support I needed to establish healthier habits that now feel sustainable long-term.

    If you’re considering Ozempic for weight loss, remember that results vary, and the medication works best when viewed as a tool within a comprehensive health plan rather than a standalone solution. The most successful approaches combine medical intervention with behavioral changes, nutritional optimization, and gradually increased physical activity.

    I encourage you to consult with healthcare providers to determine if this approach aligns with your specific health needs and to develop a personalized plan that extends beyond the initial six weeks of treatment.

    FAQs

    Q: How quickly did you notice weight loss results with Ozempic?
    A: I noticed minor weight changes (1.5 pounds) in the first week, though this was likely water weight. Consistent fat loss became evident around weeks 2-3.

    Q: Did you follow a specific diet with your Ozempic plan?
    A: Rather than a named diet, I focused on protein-rich foods, adequate fiber, and reduced refined carbohydrates. The medication naturally reduced my portion sizes and hunger levels.

    Q: What were the most challenging side effects during your six weeks?
    A: Nausea during the first week and mild constipation throughout were the most noticeable side effects, though both were manageable with simple interventions.

    Q: Can you exercise normally while taking Ozempic?
    A: I started with light walking and gradually increased intensity. By week 5, I was able to engage in moderate-intensity exercise without issues. Starting gently is recommended.

    Q: Is the weight loss from Ozempic sustainable after stopping the medication?
    A: Research suggests that some weight regain is common without continuing medication. However, the healthy habits established during treatment can help maintain a portion of the results.

    Q: How much does a six-week Ozempic plan typically cost?
    A: Without insurance, a month’s supply costs approximately $900-1,300. Many insurance plans now cover it for diabetes but have varying policies for weight management use.

  • Hers Weight Loss: 7 Best Strategies For Fast, Healthy Results

    Hers Weight Loss: 7 Best Strategies For Fast, Healthy Results

    Are you tired of weight loss approaches that promise the world but deliver little? You’re not alone. Studies show that 45% of women struggle to find effective weight loss solutions tailored to their unique bodies and lifestyles. hers weight loss programs address this gap by providing female-focused strategies that acknowledge the distinct hormonal, metabolic, and psychological factors affecting women’s weight loss journeys.

    The female-specific weight loss market has grown by 34% in the last five years, reflecting an increasing demand for personalized approaches. This comprehensive guide explores seven evidence-based strategies from hers weight loss experts designed to help women achieve sustainable results while honoring their body’s unique needs.

    Understanding Hers Weight Loss Fundamentals

    hers weight loss

    The foundation of successful weight loss for women lies in understanding female physiology. Women typically have higher body fat percentages, different hormonal patterns, and unique nutritional requirements compared to men. Research published in the Journal of Nutrition and Metabolism indicates that women often respond differently to conventional weight loss strategies.

    Key factors that make women’s weight loss distinct include:

    • Hormonal fluctuations throughout the menstrual cycle affecting metabolism and cravings
    • Pregnancy and postpartum changes that can significantly alter body composition
    • Menopause-related metabolic shifts leading to increased abdominal fat storage
    • Higher likelihood of stress-related emotional eating patterns

    A personalized approach to weight management acknowledges these factors rather than applying one-size-fits-all methods that often fail women. This tailored perspective forms the core philosophy behind effective female weight loss programs.

    Key Points: The 7 Most Effective Her Weight Loss Strategies

    1. Metabolic Optimization Through Nutrition

    Women’s metabolisms respond most effectively to balanced macronutrient approaches rather than extreme restriction. Studies show that women who maintain a 40-30-30 ratio of complex carbohydrates, lean proteins, and healthy fats lose 27% more weight than those following low-carb diets alone.

    Nutrition strategies that support female metabolism include:

    • Timing carbohydrate intake around exercise for optimal energy use
    • Consuming protein strategically throughout the day for muscle preservation
    • Incorporating omega-3 rich foods to support hormonal balance
    • Adjusting caloric intake during different phases of the menstrual cycle

    2. Hormone-Balancing Exercise Protocols

    The exercise component of successful weight loss for women works best when aligned with hormonal patterns. High-intensity workouts during the follicular phase and more restorative movement during the luteal phase have shown 22% better results than consistent high-intensity training throughout the month.

    Effective exercise strategies include:

    • Strength training 2-3 times weekly to build metabolically active tissue
    • Strategic cardio sessions during high-energy phases
    • Yoga and flexibility work during pre-menstrual periods
    • Daily movement minimums regardless of formal exercise

    3. Stress Management Techniques

    Stress management isn’t just for mental health—it’s a critical weight loss component for women. Chronic stress elevates cortisol, which promotes abdominal fat storage in women more significantly than in men. Women who incorporate daily stress management techniques show 31% greater weight loss success.

    Effective stress reduction practices include:

    • Mindfulness meditation for just 10 minutes daily
    • Breathwork techniques that activate the parasympathetic nervous system
    • Nature exposure for cortisol reduction
    • Social connection activities that reduce stress hormones

    4. Sleep Optimization Strategy

    Research from the American Journal of Clinical Nutrition found that women who sleep less than 7 hours nightly are 33% more likely to experience weight gain. Sleep affects hunger hormones ghrelin and leptin more dramatically in women, making sleep optimization essential.

    Practical sleep improvement methods include:

    • Establishing consistent sleep-wake cycles
    • Creating a sleep sanctuary environment
    • Limiting blue light exposure 2 hours before bedtime
    • Temperature regulation for optimal sleep quality

    5. Gut Health Restoration

    Women’s digestive systems influence weight regulation significantly, with studies showing that gut microbiome composition can impact weight loss success by up to 26%. Strategies for optimizing gut health include:

    • Incorporating fermented foods daily
    • Consuming 25+ grams of fiber from diverse sources
    • Limiting artificial sweeteners that disrupt gut flora
    • Implementing intermittent fasting schedules aligned with circadian rhythms

    6. Psychological Approach Shift

    The psychological component of weight loss proves particularly important for women. Research indicates that women who adopt self-compassion practices rather than self-criticism are 47% more likely to maintain weight loss long-term.

    Effective psychological strategies include:

    • Replacing “all-or-nothing” thinking with flexible approaches
    • Practicing body appreciation rather than criticism
    • Setting process goals instead of only outcome goals
    • Using visualization techniques for motivation

    7. Accountability and Support Systems

    Women with strong support systems lose an average of 42% more weight than those attempting weight loss alone. Effective support strategies include:

    • Working with health professionals specializing in women’s weight management
    • Participating in female-focused communities
    • Using technology tools for tracking and accountability
    • Establishing regular check-ins with supportive allies

    Detailed Explanation: Implementing Your Personal Strategy

    Successful implementation of these strategies requires personalization based on your unique body, preferences, and lifestyle. Begin by conducting a self-assessment of your current habits, health metrics, and previous weight loss experiences.

    For nutrition, start with a two-week food journal before making changes. This establishes your baseline and helps identify patterns like hormonal cravings or emotional eating triggers. Rather than overhauling your entire diet, implement small, sustainable changes—research shows this approach is 78% more effective for long-term adherence.

    When designing your exercise plan, consider your natural preferences and schedule demands. Women who choose activities they genuinely enjoy show 64% better adherence rates. Start with just 10-minute sessions if you’re new to exercise, gradually building duration and intensity as your fitness improves.

    Remember that integration matters more than perfection. Women who successfully implement 80% of their planned strategies consistently achieve better results than those attempting 100% perfection but frequently abandoning their efforts.

    Practical Applications: Real-World Success Stories

    Ana, 38, struggled with post-pregnancy weight for years before implementing strategy #1 and #3. By adjusting her macronutrient timing and adding daily 10-minute meditation, she lost 23 pounds over six months without extreme restriction.

    Michelle, 52, facing menopausal weight gain, focused on strategies #2 and #4. By strength training three times weekly and optimizing her sleep environment, she reversed her weight gain trend and improved her energy levels significantly.

    Sarah, 29, with PCOS-related weight struggles, prioritized strategies #5 and #7. Working with a women’s health dietitian and restoring gut health through probiotics and fiber-rich foods helped her lose 18 pounds and reduce inflammation markers significantly.

    These diverse examples highlight the importance of selecting strategies that align with your specific challenges and life stage.

    Benefits and Advantages

    The comprehensive approach to female weight loss offers benefits beyond just the number on the scale:

    • Improved metabolic markers including insulin sensitivity and cholesterol profiles
    • Enhanced mood stability and reduced anxiety symptoms
    • Better sleep quality and daytime energy levels
    • Reduced inflammation and associated health risks
    • Improved body composition with greater muscle preservation
    • Sustainable results without the damage of yo-yo dieting
    • Increased confidence and self-efficacy in health management

    Common Challenges and Solutions

    Challenge: Hormonal fluctuations causing cravings and water retention
    Solution: Track your cycle and plan accordingly. Increase protein and magnesium during the luteal phase and prioritize gentle movement during PMS days.

    Challenge: Plateau after initial weight loss
    Solution: Implement periodic “metabolic resets” with slight caloric increases for 2-3 days to prevent adaptive thermogenesis—the body’s defense against long-term caloric restriction.

    Challenge: Time constraints limiting meal preparation and exercise
    Solution: Batch cook core ingredients weekly and utilize “exercise snacking”—multiple brief activity sessions throughout the day when traditional workouts aren’t possible.

    Challenge: Social situations undermining progress
    Solution: Develop a flexible social strategy including pre-eating protein-rich snacks before events, choosing alcohol selectively, and practicing mindful indulgence rather than complete restriction.

    Best Practices

    To maximize your results with these strategies:

    1. Start small – Implement just 1-2 strategies completely before adding more
    2. Track consistently – Use apps or journals to monitor not just food but mood, sleep, and cycle phases
    3. Anticipate obstacles – Develop pre-planned responses to common challenges
    4. Celebrate non-scale victories – Track energy, mood, clothing fit and health markers beyond weight
    5. Reassess regularly – Adjust your approach every 4-6 weeks based on results and feedback
    6. Plan for maintenance – Develop transition strategies for after reaching your goals

    Conclusion

    Sustainable weight loss for women requires a holistic approach addressing the unique physiological, psychological, and lifestyle factors affecting female bodies. By implementing these seven evidence-based strategies in a personalized way, you can achieve not just weight loss but improved overall wellbeing.

    The journey to your healthiest self isn’t about restriction or punishment—it’s about creating a supportive foundation of habits that honor your body’s needs. Begin by selecting one strategy that resonates most strongly with your current challenges, and allow yourself grace as you build new patterns that support lasting health.

    Ready to take the next step? Consider consulting with a healthcare provider specializing in women’s health to develop a fully personalized plan incorporating these strategies in ways that best suit your unique body and lifestyle.

    FAQs

    How quickly can I expect to see results with these strategies?
    While some women notice changes in energy and mood within the first week, physical changes typically become noticeable after 3-4 weeks of consistent implementation. Sustainable weight loss generally occurs at a rate of 0.5-2 pounds weekly.

    Do I need to follow all seven strategies simultaneously?
    No—in fact, implementing all strategies at once often leads to overwhelm. Start with 1-2 strategies that address your most significant challenges, master those, then gradually incorporate others.

    How should I adjust these strategies during different phases of my menstrual cycle?
    During your follicular phase (days 1-14), leverage higher energy by incorporating more intense workouts and slightly higher carbohydrate intake. During your luteal phase (days 15-28), focus more on strength training, increase protein slightly, and prioritize stress management techniques.

    Are supplements necessary for successful weight loss?
    While whole foods should form the foundation of nutrition, certain supplements may help address specific needs. Common beneficial supplements include omega-3s, vitamin D, magnesium, and probiotics—but always consult a healthcare provider before starting any supplement regimen.

    How do these strategies differ for women over 50?
    Post-menopausal women typically benefit from increased protein intake (1.2-1.6g per kg of body weight), more emphasis on strength training, and targeted stress management. Sleep optimization becomes even more crucial during this life stage.

  • Crow Pose: How to Master 8 Key Steps for Balance

    Crow Pose: How to Master 8 Key Steps for Balance

    Are you constantly tumbling forward when attempting crow pose? You’re not alone. According to a recent yoga practitioner survey, 78% of beginners struggle with this fundamental arm balance, often giving up before experiencing its transformative benefits. This challenging yet accessible posture builds not just physical strength but mental fortitude too.

    Whether you’re a yoga enthusiast hoping to advance your practice or a fitness newcomer curious about arm balances, mastering crow pose can be your gateway to improved balance, core strength, and confidence on the mat. In this comprehensive guide, we’ll break down eight essential steps to finally conquer this pose, addressing common obstacles and providing actionable solutions for your journey.

    Main Topic Overview

    Crow pose (Bakasana) represents one of yoga’s most iconic arm balances, serving as a foundational posture that combines strength, balance, and mental focus. Dating back thousands of years in traditional yoga practice, this pose mimics a crow perched on a branch, requiring practitioners to balance their entire body weight on their arms while drawing their knees toward their armpits.

    Beyond its impressive appearance, crow pose offers remarkable benefits: it strengthens wrists, arms, and shoulders while engaging the core, improving concentration, and building confidence. According to yoga physiologists, regularly practicing crow pose increases bone density in the wrists and arms by up to 12% over six months, making it particularly valuable for preventing osteoporosis.

    As an entry-level arm balance, crow pose serves as a stepping stone to more advanced postures like side crow, flying crow, and eventually handstands. Mastering this pose creates a solid foundation of body awareness and strength that transfers to numerous other athletic pursuits and daily activities requiring balance and coordination.

    Key Points

    The Anatomy of Crow Pose

    Understanding the biomechanics of crow pose helps demystify the balance challenge. Your wrists bear approximately 70% of your body weight while in the full expression, requiring significant forearm and deltoid strength. The transverse abdominis (deep core muscle) activates at nearly 90% of its maximum capacity during crow pose, making it an exceptional core strengthener.

    Your hip flexors engage to bring the knees high toward the armpits, while the hip adductors work to keep the knees from sliding outward. This multi-muscle recruitment pattern explains both why crow pose feels challenging and why it offers such comprehensive strength benefits when practiced regularly.

    The 8 Essential Steps to Master Crow Pose

    1. Proper Hand Placement: Position hands shoulder-width apart, fingers spread wide like starfish with middle fingers pointing forward.
    2. Create a Solid Foundation: Stack shoulders directly over wrists, gripping the mat firmly with fingertips to create a stable base.
    3. Find Your Squat Position: From a deep squat, lift heels and shift weight forward until shoulders move in front of wrists.
    4. Engage Your Core: Draw navel toward spine, creating the necessary abdominal tension to lift and hold your body.
    5. Knee-to-Armpit Connection: Plant knees as high as possible on the backs of upper arms, creating shelf-like support.
    6. Forward Weight Shift: Gradually lean forward until toes begin to feel light, finding the tipping point.
    7. One-Foot Lift: Start by lifting one foot, then the other, eventually bringing big toes to touch.
    8. Gaze Control: Fix eyes on a stationary point 12-18 inches ahead of hands to maintain balance.

    Detailed Explanation

    Perfect Your Foundation First

    Your foundation in crow pose determines your success. A study of 150 yoga practitioners found that 65% who struggled with this pose had improper hand positioning. Your hands should be planted firmly with fingers spread wide, creating a suction-cup-like effect against the mat. This active hand engagement prevents wrist strain and creates stability.

    The common mistake of keeping hands too close together creates instability. Ideally, position hands slightly wider than shoulder-width apart—approximately 14-16 inches for the average adult. This width establishes a stable base while allowing enough space for knees to nestle against upper arms.

    For those with wrist sensitivity, try elevating the heels of your hands on a folded blanket or wedge, reducing the extreme angle of wrist flexion. This modification has helped 83% of practitioners with minor wrist issues successfully achieve the pose.

    Core Engagement Techniques

    Your core serves as the powerhouse for crow pose. Beyond the simple cue to “engage your abs,” try this more effective approach: imagine drawing your navel not just backward but slightly upward toward your lower ribs. This specific engagement activates the transverse abdominis more effectively than standard “sucking in” techniques.

    To build the necessary core strength, incorporate prep exercises like high plank holds with knee-to-elbow touches, holding each touch for 3-5 seconds. Another effective preparation is “zombie crow”—placing knees on upper arms while keeping toes on the floor and focusing on lifting the hips high with core power.

    For best results, exhale as you shift weight forward, naturally engaging the deep core muscles. Research shows that timed exhalation can increase core activation by up to 30% compared to holding the breath or inhaling during the most challenging phase of balance poses.

    Finding the Balance Point

    The tipping point in crow pose often feels elusive for beginners. Instead of trying to lift both feet simultaneously (which works for only about 12% of beginners), use this progressive approach:

    Start in your preparatory squat with knees on upper arms, then experiment with a slight forward-backward rocking motion, feeling how far forward you can lean before tipping. The ideal balance point typically occurs when your shoulders move approximately 3-4 inches ahead of your wrists.

    Once you’ve identified this tipping point, try lifting just one foot, holding for 3-5 breaths, then switching sides. This one-foot crow modification builds confidence and strength while teaching your body the precise amount of forward lean needed for the full expression.

    Practical Applications

    Crow Pose in Different Yoga Styles

    Various yoga traditions approach crow pose differently. In Ashtanga, it’s often taught with straight arms as an entry to more advanced jumps and transitions. Vinyasa teachers typically introduce it after building shoulder strength through numerous chaturangas. Iyengar practitioners might use props like blocks under feet to gradually experience the balance.

    Adapt your approach based on your primary yoga style, or better yet, experiment with different methods to find what works for your unique body. If you practice primarily power yoga, you might approach crow with more dynamism, while those from a gentle yoga background may need more time building the prerequisite strength.

    Using Crow Pose as a Transitional Movement

    Once comfortable holding crow pose for 5-8 breaths, experiment with using it as a transition. Try moving from crow pose directly into a tripod headstand, or practice jumping back from crow into chaturanga. These dynamic transitions appear in many intermediate vinyasa classes.

    For a more accessible transition, practice moving from crow pose back to a forward fold or into a squat position. This builds confidence for eventually attempting the more advanced transitions while improving your body’s spatial awareness.

    Benefits and Advantages

    Physical Benefits

    1. Upper Body Strength: Regular practice increases arm and shoulder strength by up to 30% within 8 weeks.
    2. Core Definition: Engages deep abdominal muscles that ordinary crunches miss, particularly the lower abdominals.
    3. Improved Digestion: The compression of abdominal organs stimulates digestive fire according to Ayurvedic principles.
    4. Wrist Mobility: Increases range of motion in wrists, beneficial for those who work at keyboards.
    5. Enhanced Balance: Develops proprioception (body awareness) that transfers to everyday activities.

    Mental Benefits

    1. Fear Confrontation: Overcoming the fear of falling develops mental resilience.
    2. Improved Focus: Requires present-moment awareness that trains attention span.
    3. Confidence Building: Mastering a challenging pose creates a sense of accomplishment that extends beyond the mat.
    4. Stress Reduction: The intense focus required temporarily silences anxious thoughts, creating a meditative state.

    Common Challenges and Solutions

    Challenge: Face-Planting

    Solution: Place a pillow or folded blanket in front of your mat during practice. This safety net reduces fear, allowing you to lean forward more confidently. Additionally, practice the pose with your toes on a 2-inch block to reduce the distance between your feet and the floor, making the initial lift less intimidating. Approximately 92% of beginners report increased confidence with these modifications.

    Challenge: Knees Sliding Off Arms

    Solution: Apply chalk or use a yoga towel on sweaty arms for better friction. Try practicing in a cooler room initially, as excessive sweat is reported by 58% of practitioners as a significant obstacle. You can also wrap your arms with athletic tape or wear a long-sleeved shirt to create more grip for your knees.

    Challenge: Wrist Pain

    Solution: Build wrist strength gradually with preparatory exercises like tabletop position holds and gentle wrist rotations. Studies show that 3 minutes of wrist preparation reduces discomfort by 65% during arm balances. Consider using a wedge or folded blanket under your heels to reduce the angle of wrist flexion while you build strength.

    Challenge: Core Weakness

    Solution: Incorporate supplementary exercises like boat pose (Navasana) and forearm plank holds into your regular practice. Just 5 minutes daily of targeted core work improves crow pose success rate by 40% within three weeks. The hollow body hold from gymnastics is particularly effective at building the specific core engagement needed for crow pose.

    Best Practices

    Preparation Sequence

    Before attempting crow pose, warm up with this effective sequence:

    1. Downward Dog (1 minute) to awaken shoulder and core connection
    2. Plank Pose (30-second holds x 3) to prepare wrists and shoulders
    3. Malasana (garland squat) (1 minute) to open hips and prepare for the crow position
    4. Cat-Cow movements (10 cycles) to warm the spine and core

    This precise warm-up routine increases success rate by 75% compared to attempting crow pose cold.

    Safe Progression Timeline

    Follow this conservative timeline to build toward full crow pose:

    • Weeks 1-2: Practice hand position and knee shelf placement daily
    • Weeks 3-4: Work on one-foot variations, holding for 5 breaths per side
    • Weeks 5-6: Attempt full pose with both feet lifted for 1-3 breaths
    • Weeks 7-8: Build endurance, aiming for 5-8 steady breaths

    This gradual progression reduces injury risk while building necessary strength components. According to yoga therapy research, students who follow a structured progression are 3.5 times more likely to successfully maintain the pose compared to those who rush the process.

    Conclusion

    Mastering crow pose represents more than just a physical achievement—it marks a significant milestone in your yoga journey. The pose embodies the perfect balance of strength and finesse, teaching valuable lessons about patience, persistence, and proper technique. By following the eight key steps outlined in this guide and addressing common challenges with proven solutions, you’ll develop the necessary physical tools and mental confidence to lift off successfully.

    Remember that progress in crow pose often comes in small increments rather than dramatic breakthroughs. Each practice brings you closer to the full expression, developing valuable strength and body awareness along the way. Whether you’re using crow pose as a stepping stone to more advanced arm balances or simply enjoying the benefits it offers on its own, the skills you develop will serve your broader fitness and wellness goals.

    Take your practice to new heights by implementing these strategies consistently. Your arms and core will thank you, and the sense of achievement when you finally find that perfect balance point will be well worth the effort.

    FAQs

    How long does it typically take to master crow pose?

    Most practitioners achieve a stable 5-breath hold within 6-8 weeks of consistent practice (3-4 times weekly). However, this timeline varies significantly based on your starting strength, body proportions, and previous yoga experience. About 30% of beginners achieve a brief balance within the first two weeks, while others may take 3-4 months to build the necessary strength foundations.

    Can people with wrist injuries practice crow pose?

    Those with mild wrist discomfort can modify the pose using wedges or by practicing on their knuckles instead of flat palms. However, individuals with acute wrist injuries, carpal tunnel syndrome, or recent wrist surgeries should avoid crow pose until cleared by a healthcare provider. Alternative core and arm strengthening exercises can prepare the body while wrists heal.

    Does body weight affect the ability to perform crow pose?

    While body composition can influence the approach to crow pose, practitioners of all sizes can successfully master this posture with proper technique. The key factor is strength-to-weight ratio rather than weight alone. Focus on building proportional strength and using proper knee placement rather than viewing weight as a limiting factor.

    What’s the difference between crow pose and crane pose?

    Though often used interchangeably, these are technically different poses. In crow pose (Bakasana), the arms are bent, and the knees rest on the shelf of the upper arms. In crane pose (Kakasana), the arms are straight, and the knees are placed higher, near the armpits. Crow is generally considered more accessible for beginners, while crane requires greater strength and balance.

    Is it normal to feel shoulder fatigue when practicing crow pose?

    Yes, shoulder fatigue is common, especially for beginners. The pose requires significant engagement from the deltoids, trapezius, and rotator cuff muscles. If you experience sharp or shooting pain (rather than muscle fatigue), take a break and check your alignment. Building shoulder endurance through consistent practice and supplementary exercises like dolphin pose will reduce fatigue over time.

  • Step Machine Exercise Routines: 7 Proven Workouts for Rapid Results

    Step Machine Exercise Routines: 7 Proven Workouts for Rapid Results

    Are you looking to elevate your fitness journey with effective cardio workouts that deliver impressive results? Step machine exercise routines offer a powerful combination of cardiovascular conditioning and lower body strengthening that can transform your fitness regimen. According to recent fitness industry data, step machines rank among the top five most effective cardio equipment for calorie burning, with users typically burning 400-600 calories per hour during moderate to intense sessions. Whether you’re a fitness enthusiast or just beginning your wellness journey, these versatile machines provide scalable workouts suitable for all fitness levels.

    In this comprehensive guide, we’ll explore seven science-backed step machine workouts designed to deliver rapid results, along with expert tips to maximize your training efficiency and avoid common mistakes that might hinder your progress.

    Main Topic Overview

    step machine exercise routines

    Step machines, also known as stair climbers or steppers, simulate the motion of climbing stairs while providing a controlled, low-impact environment for cardiovascular and strength training. These machines have evolved significantly since their introduction in the 1980s, with modern versions offering adjustable resistance levels, customizable programs, and performance tracking capabilities.

    The American College of Sports Medicine highlights stair climbing as one of the most efficient exercises for improving cardiorespiratory fitness. Research published in the Journal of Sports Medicine and Physical Fitness demonstrates that regular step machine training can increase VO2 max (maximum oxygen consumption) by up to 17% within just eight weeks of consistent training, making it an excellent choice for those seeking rapid fitness improvements.

    Beyond cardio benefits, step machine exercise routines effectively target key lower body muscle groups including quadriceps, hamstrings, glutes, and calves, while also engaging your core for stability. This comprehensive muscle engagement makes step machines particularly valuable for those seeking full-body conditioning in time-efficient workouts.

    Key Points

    When incorporating step machine workouts into your fitness routine, several critical factors will determine your success:

    1. Proper Form and Technique: Maintaining upright posture with engaged core muscles prevents lower back strain and maximizes workout efficiency. Studies indicate that proper form can increase calorie burn by up to 23% compared to improper technique.
    2. Progressive Overload Principle: Gradually increasing workout intensity—through longer durations, higher resistance, or more challenging intervals—is essential for continuous improvement. Fitness data shows plateaus typically occur after 4-6 weeks without workout progression.
    3. Workout Variety: Implementing various step patterns, resistance levels, and interval structures prevents adaptation and continuously challenges your cardiovascular system and muscles.
    4. Recovery Integration: Strategic recovery periods within workouts (active recovery) and between training sessions (passive recovery) optimize performance and results while minimizing injury risk.
    5. Complementary Nutrition: Supporting your step machine training with proper nutrition enhances recovery, muscle development, and overall performance. Hydration is particularly crucial, with research showing even mild dehydration can decrease stepping performance by up to 12%.

    Detailed Explanation: The 7 Proven Step Machine Routines

    1. The Pyramid Climb

    This workout gradually increases intensity before systematically decreasing, creating an effective cardiovascular challenge while managing fatigue.

    Structure:

    • Warm-up: 3 minutes at low resistance
    • Minute 4-6: Increase resistance by one level every minute
    • Minute 7-12: Maintain peak resistance
    • Minute 13-18: Decrease resistance by one level every minute
    • Cool-down: 3 minutes at low resistance

    Why it works: Research in the International Journal of Exercise Science shows pyramid-structured workouts optimize the balance between anaerobic and aerobic systems, promoting both endurance and power development simultaneously.

    2. HIIT Step Intervals

    High-Intensity Interval Training on the step machine delivers maximum calorie burn in minimal time through alternating high-intensity and recovery periods.

    Structure:

    • Warm-up: 5 minutes at moderate pace
    • 30 seconds maximum effort, 90 seconds recovery (×8 rounds)
    • Cool-down: 5 minutes gradually decreasing pace

    Why it works: A 2021 study published in the Journal of Strength and Conditioning Research demonstrated that HIIT protocols on step machines increased excess post-exercise oxygen consumption (EPOC), resulting in continued calorie burning for up to 24 hours post-workout.

    3. Endurance Builder

    Designed to improve cardiovascular stamina through sustained moderate-intensity effort:

    Structure:

    • Warm-up: 5 minutes gradually increasing pace
    • 30-45 minutes at 65-75% of maximum heart rate
    • Cool-down: 5 minutes gradually decreasing pace

    Why it works: Steady-state cardio at moderate intensity optimizes fat utilization as fuel and strengthens cardiac output over time, with data showing improved stroke volume by up to 20% after 12 weeks of consistent training.

    4. The Triple Threat

    This routine targets the three major lower body muscle groups through varied stepping patterns:

    Structure:

    • Warm-up: 5 minutes standard stepping
    • 5 minutes wide stance (focuses on inner thighs)
    • 5 minutes shallow steps (emphasizes quadriceps)
    • 5 minutes deep steps (targets glutes and hamstrings)
    • Repeat circuit 2-3 times
    • Cool-down: 5 minutes standard stepping

    Why it works: Electromyography (EMG) studies confirm that varying step patterns significantly changes muscle recruitment patterns, ensuring comprehensive lower body development.

    5. Power Step Challenge

    Incorporating brief power bursts into a moderate-intensity foundation:

    Structure:

    • Warm-up: 5 minutes standard stepping
    • 20 minutes alternating between:
      • 3 minutes moderate intensity
      • 1 minute power stepping (maximum speed while maintaining control)
    • Cool-down: 5 minutes decreasing intensity

    Why it works: Power intervals stimulate fast-twitch muscle fibers often neglected in steady-state cardio, improving neuromuscular efficiency and power output.

    6. Progressive Resistance Climb

    This routine focuses on gradually increasing resistance levels:

    Structure:

    • Warm-up: 5 minutes low resistance
    • Start at 40% of maximum resistance
    • Increase resistance by 10% every 3 minutes
    • Once reaching 90%, maintain for 5 minutes
    • Cool-down: 5 minutes gradually decreasing resistance

    Why it works: Progressive loading directly stimulates muscle adaptation while challenging cardiovascular systems to adapt to increasing workloads.

    7. The 20/10 Step Challenge

    Based on Tabata principles, this high-intensity approach maximizes caloric expenditure:

    Structure:

    • Warm-up: 5 minutes standard stepping
    • 8 rounds of:
      • 20 seconds maximum effort
      • 10 seconds complete rest
    • Active recovery: 2 minutes moderate stepping
    • Repeat for 3-4 sets
    • Cool-down: 5 minutes decreasing intensity

    Why it works: Research from the American Council on Exercise shows this 20/10 protocol can elevate metabolic rate by up to 30% compared to steady-state cardio of equal duration.

    Practical Applications

    Integrate these step machine routines into your fitness program based on your specific goals:

    • Weight Management: Implement the HIIT Step Intervals and 20/10 Challenge 2-3 times weekly, as these maximize calorie burn during and after exercise.
    • Cardiovascular Health: The Endurance Builder and Progressive Resistance Climb routines 3-4 times weekly effectively strengthen heart function and improve blood pressure management.
    • Lower Body Toning: Alternate between the Triple Threat and Pyramid Climb routines 3 times weekly to comprehensively develop leg and glute muscles.
    • Busy Schedules: The 20/10 Step Challenge and HIIT Intervals deliver maximum results in minimal time, making them ideal for time-constrained individuals.
    • Cross-Training: Athletes from other disciplines can use the Power Step Challenge to complement sport-specific training while developing cardiovascular efficiency.

    Benefits and Advantages

    Step machine training offers numerous evidence-backed advantages:

    • Joint-Friendly Impact: Unlike running, step machines provide cardiovascular benefits without high-impact stress on joints, reducing injury risk by up to 30% compared to treadmills.
    • Efficiency: Studies show step machines engage more muscle groups simultaneously than many other cardio machines, improving workout efficiency.
    • Metabolic Enhancement: Regular stepping workouts increase resting metabolic rate by up to 7%, according to research from the University of Michigan.
    • Functional Strength: The stepping motion directly translates to daily activities, improving functional fitness for real-world movements.
    • Bone Density Support: The weight-bearing nature of stepping helps maintain bone mineral density, with studies showing 12% improvements in high-risk populations after six months.

    Common Challenges and Solutions

    Challenge: Knee Discomfort

    Solution: Maintain proper form with knees tracking over toes, not extending past them. Research shows reducing step depth by 15% significantly decreases knee stress while maintaining 92% of workout effectiveness.

    Challenge: Lower Back Pain

    Solution: Engage core muscles throughout your workout and avoid leaning heavily on handrails. Fitness professionals recommend maintaining a natural spinal curve with shoulders back and down.

    Challenge: Cardiovascular Plateaus

    Solution: Implement workout periodization by alternating between the different routines outlined above. Studies demonstrate that varying workout protocols every 2-3 weeks prevents adaptation and continues progress.

    Challenge: Motivation Maintenance

    Solution: Track performance metrics to visualize progress, establish clear goals, and incorporate entertainment (music, podcasts, or TV) during longer sessions. Research indicates that music can increase workout duration by up to 15%.

    Best Practices

    1. Proper Warm-Up: Always begin with 3-5 minutes of gradually increasing intensity to prepare muscles and cardiovascular system.
    2. Hydration Protocol: Consume 16-20 oz of water 2 hours before stepping workouts and 7-10 oz every 15-20 minutes during exercise.
    3. Footwear Selection: Wear supportive cross-training shoes with cushioned midsoles to absorb impact and provide stability.
    4. Form Maintenance: Perform periodic form checks by occasionally working out near mirrors or recording short video segments for self-assessment.
    5. Progress Tracking: Document workout parameters (duration, resistance, steps per minute) to objectively measure improvement over time.

    Conclusion

    Step machine exercise routines represent one of the most effective approaches to cardiovascular fitness and lower body strengthening. By implementing these seven proven workouts with proper technique and progressive intensity, you can achieve remarkable improvements in endurance, strength, and body composition.

    The versatility of step machines makes them suitable for virtually all fitness levels, while their low-impact nature ensures sustainability for long-term fitness development. Whether you’re seeking weight management, improved athletic performance, or enhanced overall health, these evidence-based routines provide a structured path to your fitness goals.

    Ready to take your fitness to new heights? Select one of these proven routines and commit to consistent implementation for at least four weeks to experience the transformative benefits of strategic step machine training.

    FAQs

    How often should I perform step machine workouts for optimal results?

    For beginners, start with 2-3 sessions weekly, allowing 48 hours between workouts for recovery. Intermediate and advanced individuals can increase to 4-5 sessions weekly, alternating between high and moderate-intensity routines.

    Are step machines effective for weight loss?

    Yes, research demonstrates that step machines rank among the top calorie-burning exercise equipment, with the potential to burn 400-600+ calories per hour depending on intensity and body weight. When combined with proper nutrition, step machine training creates an effective caloric deficit for weight management.

    Will step machine workouts make my legs bulky?

    No, standard step machine training primarily develops muscular endurance rather than significant hypertrophy. The resistance levels typically aren’t high enough to create substantial muscle growth without additional resistance training.

    How long should my step machine workouts be?

    Effective sessions range from 20-45 minutes depending on intensity. HIIT-style workouts can deliver results in as little as 20 minutes, while moderate-intensity sessions might extend to 45 minutes for optimal benefits.

    Can beginners use step machines safely?

    Absolutely. Beginners should start with shorter sessions (15-20 minutes) at lower resistance levels, focusing on proper form and gradually increasing duration and intensity as fitness improves. Using the handrails for balance initially is appropriate while developing stability.

  • Sandbag Exercises: 7 Best Moves to Boost Your Strength and Stability

    Sandbag Exercises: 7 Best Moves to Boost Your Strength and Stability

    Are you tired of the same old workout routine? Looking for a versatile training tool that delivers serious functional strength gains? sandbag exercises might be exactly what your fitness regimen needs. Unlike traditional weights with fixed shapes and predictable centers of gravity, sandbags create an unstable load that forces your body to continuously adapt, engaging more muscles and delivering superior functional strength benefits.

    Research from the Journal of Strength and Conditioning Research shows that training with unstable loads like sandbags can increase muscle activation by up to 24% compared to traditional weights. This translates to more efficient workouts and better real-world strength applications. Let’s dive into the world of sandbag training and discover how these shifting weights can transform your fitness journey.

    Main Topic Overview

    sandbag exercises

    Sandbag training represents one of the oldest and most effective forms of strength conditioning, dating back thousands of years. Modern fitness enthusiasts are rediscovering this ancient training method for good reason: sandbags provide an affordable, adaptable, and highly effective way to build functional strength that translates directly to everyday activities.

    What makes sandbag training unique is the constantly shifting load. As you move, the sand redistributes inside the bag, creating an unstable resistance that challenges your body in ways that barbells and dumbbells simply cannot. This unpredictable resistance forces your stabilizing muscles to work overtime, improving balance, coordination, and core strength simultaneously.

    With weight options typically ranging from 10 to 100+ pounds, sandbags are suitable for all fitness levels, from beginners to elite athletes. And unlike expensive gym equipment, a quality sandbag costs between $30-$150, making it a budget-friendly addition to any home gym setup.

    Key Points

    Why Choose Sandbag Training?

    1. Functional Strength Development: Sandbag training mimics real-life movements and challenges, making the strength you develop directly applicable to everyday activities.
    2. Comprehensive Muscle Recruitment: The unstable nature of sandbags activates stabilizing muscles that often remain dormant during traditional weight training.
    3. Versatility: One sandbag can replace multiple pieces of gym equipment, offering exercises for every major muscle group.
    4. Portability: Unlike bulky gym equipment, sandbags can be emptied for travel and refilled at your destination.
    5. Durability: Quality sandbags can withstand intense training conditions, including outdoor use in various weather conditions.

    Detailed Explanation

    The 7 Most Effective Sandbag Exercises

    1. Sandbag Clean and Press

    This compound movement engages your entire body, from legs to shoulders.

    How to perform:

    • Stand with feet shoulder-width apart, sandbag on the floor between your feet
    • Squat down and grip the bag firmly
    • Explosively stand up, using momentum to bring the bag to shoulder height
    • Press the bag overhead until arms are fully extended
    • Lower the bag back to shoulder height, then to the ground
    • Repeat for 8-12 repetitions

    Pro tip: Focus on hip drive during the clean portion to minimize strain on your lower back.

    2. Sandbag Squat

    How to perform:

    • Hold the sandbag in the front rack position (against your chest)
    • Stand with feet slightly wider than shoulder-width
    • Keeping your chest up, squat down until thighs are parallel to the ground
    • Drive through your heels to return to standing position
    • Complete 10-15 repetitions

    Why it works: The shifting weight of the sandbag forces your core and stabilizing muscles to work harder than during a traditional barbell squat.

    3. Sandbag Lunge and Rotation

    How to perform:

    • Hold the sandbag at chest height
    • Step forward into a lunge position
    • As you lunge, rotate your torso toward the front leg
    • Return to center, push back to starting position
    • Alternate legs for 10-12 repetitions per side

    Performance enhancement: This exercise improves rotational strength crucial for sports performance and daily activities like carrying groceries or children.

    4. Sandbag Bear Hug Carry

    How to perform:

    • Lift the sandbag and hold it tightly against your chest
    • Walk forward maintaining an upright posture
    • Aim for distance (50-100 yards) rather than repetitions
    • Take measured, controlled steps

    Training insight: Studies show that loaded carries improve core stability more effectively than traditional core exercises, with greater carryover to functional activities.

    5. Sandbag Shouldering

    How to perform:

    • Start with the sandbag on the ground
    • Squat down and grip the sandbag firmly
    • Lift and position the bag onto one shoulder
    • Lower it back to the ground
    • Alternate shoulders for 6-8 reps per side

    Why it’s effective: This movement builds rotational power and grip strength while challenging your body to manage an awkward, shifting load.

    6. Sandbag Rotational Lunge

    How to perform:

    • Hold the sandbag at chest height
    • Step forward into a lunge position with your right foot
    • Rotate your torso to the right
    • Return to center, then back to starting position
    • Repeat on the left side
    • Complete 8-10 repetitions per side

    Training benefit: This exercise enhances hip mobility while building rotational core strength, essential for athletic performance.

    7. Sandbag Get-Up

    How to perform:

    • Lie on your back with the sandbag on your chest
    • Roll to one side, then come to a kneeling position
    • Stand up while keeping the sandbag at chest height
    • Reverse the movement to return to the starting position
    • Complete 5-8 repetitions

    Performance insight: This full-body movement improves ground-to-standing transition strength, crucial for both athletic performance and everyday mobility.

    Practical Applications

    Sandbag training offers exceptional carryover to real-life activities:

    • For parents: The shifting weight mimics carrying children, making daily activities less physically taxing.
    • For athletes: Improves performance in sports requiring rotational power and stability, like golf, tennis, and baseball.
    • For manual laborers: Develops the functional strength needed for lifting and carrying irregular objects.
    • For tactical professionals: Simulates the unpredictable loads encountered by military, police, and firefighters.

    A 2019 study published in the International Journal of Sports Physical Therapy found that just 8 weeks of sandbag training improved functional movement scores by 18% compared to traditional weight training.

    Benefits and Advantages

    1. Improves Core Stability: The constant destabilization forces your core to maintain tension throughout exercises.
    2. Enhances Proprioception: Your body becomes more aware of its position in space, improving balance and coordination.
    3. Increases Grip Strength: Gripping and controlling a sandbag is considerably more challenging than handling barbells or dumbbells.
    4. Boosts Cardiovascular Fitness: The full-body nature of sandbag exercises elevates heart rate more effectively than isolated movements.
    5. Develops Mental Toughness: Managing an awkward, shifting load builds psychological resilience alongside physical strength.
    6. Strengthens Connective Tissue: The varied load angles strengthen ligaments and tendons from multiple directions.
    7. Prevents Training Plateaus: The constantly changing resistance prevents adaptation and keeps progress moving forward.

    Common Challenges and Solutions

    Challenge 1: Difficulty Maintaining Grip

    Solution: Start with a lighter sandbag and gradually build grip strength. Consider using chalk for better grip, and focus on proper hand positioning during exercises.

    Challenge 2: Lower Back Strain

    Solution: Always maintain core tension during lifts and avoid rounding your back. Start with lighter weights until your technique is solid, and consider using a smaller sandbag for technically demanding movements.

    Challenge 3: Finding the Right Weight

    Solution: Begin with a sandbag that’s approximately 15-20% of your body weight for most exercises. For sandbags with adjustable weight, start lighter and add sand as your strength improves.

    Challenge 4: Sandbag Construction Issues

    Solution: Invest in a quality sandbag with reinforced seams and durable materials. DIY options should use heavy-duty contractor bags inside a canvas or military duffle bag for durability.

    Best Practices

    1. Progressive Overload: Increase weight gradually by adding more sand as you get stronger.
    2. Circuit Training: Combine 3-4 sandbag exercises in a circuit for an efficient, full-body workout.
    3. Interval Training: Alternate between high-intensity sandbag exercises and rest periods for maximum fat burning.
    4. Technique First: Master proper form with lighter weights before increasing the load.
    5. Varied Grip Positions: Alternate between handles, bear hugs, and shoulder carries to challenge different muscle groups.
    6. Recovery Time: Allow 48-72 hours between intense sandbag training sessions for proper recovery.
    7. Complementary Training: Combine sandbag workouts with mobility work and traditional strength training for balanced fitness development.

    Conclusion

    Sandbag exercises represent one of the most effective, versatile, and affordable ways to develop real-world strength and stability. The unpredictable nature of the shifting weight creates unique training stimulus that traditional weights simply cannot match, resulting in more functional fitness gains that transfer directly to daily activities and athletic performance.

    Whether you’re a beginner looking to start your fitness journey, an athlete seeking a performance edge, or someone wanting to bring variety to their existing routine, sandbag training offers substantial benefits with minimal investment. The seven exercises outlined in this guide provide a comprehensive foundation for exploring this highly effective training method.

    Ready to experience the difference sandbag training can make? Start with just 2-3 sessions per week, focusing on proper technique, and you’ll quickly discover why this ancient training method is making a powerful comeback in modern fitness.

    FAQs

    How heavy should my sandbag be for beginners?

    For beginners, start with a sandbag weighing approximately 10-15% of your body weight. This allows you to focus on technique while still providing sufficient resistance. As you become more comfortable with the movements, gradually increase to 20-25% of your body weight.

    Can sandbag training replace traditional weight training?

    While sandbag training offers unique benefits, it works best as a complement to traditional weight training rather than a complete replacement. Combine both for optimal results, using sandbags for functional, full-body movements and traditional weights for targeted strength development.

    How often should I incorporate sandbag exercises into my routine?

    For most individuals, 2-3 sandbag training sessions per week provides excellent results without overtraining. These sessions can be standalone workouts or incorporated into existing routines as finishers or specialized training days.

    What muscles do sandbag exercises target most effectively?

    Sandbag training excels at developing the core, posterior chain (back, glutes, hamstrings), shoulders, and grip strength. However, the full-body nature of most sandbag exercises ensures comprehensive muscle development.

    Can I make my own sandbag instead of buying one?

    Yes, DIY sandbags can be effective. Use a military duffle bag or heavy-duty canvas bag, and fill it with play sand sealed in contractor bags. Ensure your homemade sandbag is durable enough to withstand repeated drops and throws.

    Are sandbag exercises suitable for rehabilitation?

    When supervised by qualified professionals, lighter sandbag exercises can be excellent for rehabilitation. The unstable nature helps rebuild proprioception and stabilizing muscles often weakened after injury. Always consult with a healthcare provider before beginning any rehabilitation program.

  • Home pectoral exercises: 7 best moves for a stronger chest

    Home pectoral exercises: 7 best moves for a stronger chest

    Are you looking to build an impressive chest without the need for fancy gym equipment? You’re not alone. According to recent fitness trends, over 70% of Americans now prefer working out at home, with chest exercises ranking among the top three muscle groups people want to develop. Home pectoral exercises offer a convenient yet effective solution for anyone looking to strengthen their chest, improve posture, and enhance upper body aesthetics—all from the comfort of their living room.

    Whether you’re a fitness enthusiast adapting to home workouts or a beginner looking to start your strength journey, these seven scientifically-backed home pectoral exercises will transform your chest development without requiring expensive equipment or gym memberships.

    Understanding Home Chest Workouts

    home pectoral exercises
    home pectoral exercises

    The pectoral muscles (commonly called “pecs”) consist primarily of two parts: the pectoralis major and pectoralis minor. These muscles are responsible for movements like pushing, lifting, and hugging motions. When properly trained, they contribute significantly to upper body strength and aesthetic appearance.

    The beauty of chest exercises is their adaptability to home environments. Research published in the Journal of Strength and Conditioning Research indicates that bodyweight chest exercises can activate up to 95% of the muscle fibers that weighted gym exercises do when performed correctly. This means you can effectively build chest strength without specialized equipment.

    Key chest workout benefits include:

    • Improved pushing strength for daily activities
    • Enhanced posture and shoulder stability
    • Balanced upper body development
    • Increased functional fitness
    • Greater metabolic burn (chest muscles are large and burn significant calories when worked)

    Key Points for Effective Home Chest Training

    When approaching home pectoral training, understanding these fundamental principles will maximize your results:

    1. Progressive Overload Principle
    Even at home, you need to continually challenge your muscles. This means gradually increasing resistance, repetitions, or exercise difficulty over time. Without progression, your chest development will plateau.

    2. Proper Form Trumps Everything
    A study from the American Council on Exercise found that proper form during chest exercises increases muscle activation by up to 30% compared to improper execution. Master technique before increasing intensity.

    3. Mind-Muscle Connection
    Consciously focusing on your chest contracting during exercises enhances results. Research shows this mental engagement can increase muscle activation by 20-25%.

    4. Recovery Is Essential
    Allow 48-72 hours between intensive chest workouts. Muscle growth occurs during recovery, not during the workout itself.

    5. Varied Angles Matter
    Targeting your chest from multiple angles (high, middle, low) ensures complete development of all pectoral fibers.

    The 7 Best Home Pectoral Exercises

    1. Standard Push-Ups

    Execution:

    • Begin in a plank position with hands slightly wider than shoulder-width
    • Keep your body straight from head to heels
    • Lower your chest to approximately 2 inches from the floor
    • Push back up while maintaining a tight core
    • Perform 3 sets of 8-15 repetitions

    Why it works: Push-ups engage 76% of your pectoral muscle fibers while simultaneously working your shoulders, triceps, and core. They’re the foundation of any effective home chest routine.

    Pro tip: If standard push-ups are too challenging, start with knee push-ups or incline push-ups against a sturdy surface like a countertop.

    2. Decline Push-Ups

    Execution:

    • Place your feet on an elevated surface (couch, chair, or step)
    • Position hands on the floor at shoulder width
    • Lower your chest toward the floor while keeping elbows at roughly 45° angles
    • Push back up to starting position
    • Complete 3 sets of 8-12 repetitions

    Why it works: This variation shifts emphasis to the upper pectoral region (clavicular head) – an area many home workouts neglect. The decline angle increases activation of the upper chest by approximately 23% compared to standard push-ups.

    3. Diamond Push-Ups

    Execution:

    • Form a diamond shape with your thumbs and index fingers touching
    • Position the diamond directly under your chest
    • Keep elbows close to your sides as you lower
    • Push back up with control
    • Aim for 3 sets of 6-10 repetitions

    Why it works: Diamond push-ups intensify the inner chest and triceps engagement. EMG studies show they generate up to 41% more activity in the triceps and inner pectoral regions compared to standard push-ups.

    4. Wide-Grip Push-Ups

    Execution:

    • Place hands significantly wider than shoulder width
    • Maintain a straight body line from head to heels
    • Lower until your chest nearly touches the floor
    • Push back up with force
    • Complete 3 sets of 8-12 repetitions

    Why it works: The wide hand position increases activation across the entire pectoralis major, particularly targeting the outer portions. This variation is excellent for developing chest width and overall mass.

    5. Chest Dips (Using Furniture)

    Execution:

    • Position yourself between two sturdy chairs or similar objects
    • Grip the edges with hands behind you
    • Lower your body by bending your elbows to 90°
    • Push through your palms to rise back up
    • Perform 3 sets of 8-12 repetitions

    Why it works: Dips create significant resistance on the lower pectoral muscles and triceps. When performed with a slight forward lean, they target the lower chest fibers that are difficult to engage with standard push-ups.

    6. Plyometric Push-Ups

    Execution:

    • Begin in a standard push-up position
    • Lower your chest toward the ground
    • Push up explosively so your hands leave the floor
    • Land with soft elbows and immediately prepare for next repetition
    • Aim for 3 sets of 6-10 repetitions

    Why it works: The explosive nature of this movement recruits fast-twitch muscle fibers, which have the greatest potential for growth. Research shows plyometric training can increase chest power output by up to 17% in just 8 weeks.

    7. Resistance Band Chest Press

    Execution:

    • Secure a resistance band behind you (around a sturdy post or doorway)
    • Hold handles at chest height with elbows bent
    • Press forward, extending arms fully
    • Control the return movement
    • Complete 3 sets of 12-15 repetitions

    Why it works: Resistance bands provide variable resistance throughout the movement, which creates tension on the pectoral muscles even at full extension – something bodyweight exercises alone can’t achieve.

    Practical Applications: Creating Your Home Chest Workout

    For optimal results, structure your home chest workout using these principles:

    Beginner Routine:

    • Standard Push-Ups: 3 sets of 8-10 reps
    • Incline Push-Ups: 3 sets of 10-12 reps
    • Resistance Band Chest Press: 3 sets of 12-15 reps
    • Rest 60-90 seconds between sets
    • Perform twice weekly with at least 48 hours between sessions

    Intermediate Routine:

    • Standard Push-Ups: 3 sets of 12-15 reps
    • Diamond Push-Ups: 3 sets of 8-10 reps
    • Decline Push-Ups: 3 sets of 10-12 reps
    • Chest Dips: 3 sets of 8-10 reps
    • Rest 45-60 seconds between sets
    • Perform 2-3 times weekly with adequate recovery

    Advanced Routine:

    • Plyometric Push-Ups: 3 sets of 8-10 reps
    • Wide-Grip Push-Ups: 3 sets of 12-15 reps
    • Chest Dips: 3 sets of 10-12 reps
    • Decline Push-Ups: 3 sets of 12-15 reps
    • Diamond Push-Ups: 3 sets of 10-12 reps
    • Rest 30-45 seconds between sets
    • Perform 3 times weekly in a push/pull/legs split

    Benefits and Advantages of Home Pectoral Training

    The advantages of focused home chest training extend beyond merely building muscle:

    1. Improved Functional Strength: A strong chest translates to better performance in daily pushing activities.
    2. Enhanced Posture: Strong pectorals help balance the pulling muscles of the back, leading to improved posture and reduced risk of shoulder injuries.
    3. Metabolic Benefits: Chest workouts engage one of the body’s largest muscle groups, burning significant calories. Research indicates that high-intensity chest training can elevate metabolism for up to 36 hours post-workout.
    4. Convenience and Consistency: Home workouts eliminate commute time and membership costs, increasing adherence rates by up to 42% according to fitness industry research.
    5. Progressive Results: When performed consistently, home chest exercises produce visible results in 6-8 weeks for most individuals.

    Common Challenges and Solutions

    Challenge #1: Limited Equipment
    Solution: Focus on variations in body position and leverage rather than adding weight. Increasing time under tension (slower reps) and decreasing rest periods can significantly intensify bodyweight exercises.

    Challenge #2: Form Issues
    Solution: Use mirrors or video recording to check your form. Common push-up errors include sagging hips, flared elbows, and insufficient range of motion. Correcting these can immediately improve results.

    Challenge #3: Plateaus
    Solution: Implement periodization by cycling between weeks of high reps (15-20), moderate reps (10-15), and low reps with advanced variations (8-10). This prevents adaptation and ensures continued progress.

    Challenge #4: Muscle Imbalances
    Solution: Balance your chest routine with pulling exercises like resistance band rows or doorway rows to prevent shoulder issues from developing.

    Best Practices for Home Chest Training

    1. Warm-Up Properly: Perform 3-5 minutes of dynamic movements like arm circles, torso rotations, and knee-to-chest pulls before beginning chest exercises.
    2. Prioritize Technique: Aim for full range of motion with controlled eccentric (lowering) phases lasting 2-3 seconds for maximum muscle fiber recruitment.
    3. Nutrition Support: Consume adequate protein (0.7-1g per pound of bodyweight daily) to support muscle recovery and growth.
    4. Track Progress: Record repetitions, sets, and perceived exertion to ensure you’re progressively overloading your muscles.
    5. Rest Adequately: Allow 48 hours between intense chest sessions, but consider that higher frequency (3x weekly) with moderate volume often produces better results than infrequent, high-volume sessions.

    Conclusion

    Building an impressive chest doesn’t require expensive equipment or gym memberships. These seven home pectoral exercises provide everything needed to develop strength, definition, and functional power from the comfort of your living room.

    By applying the principles of progressive overload, proper form, and consistent training, you can achieve remarkable chest development using primarily your body weight. Start with the routine that matches your current fitness level, follow the best practices outlined above, and adjust as you grow stronger.

    Ready to take your home fitness journey to the next level? Begin implementing these exercises today, and within 6-8 weeks, you’ll notice significant improvements in your chest development, posture, and overall upper body strength.

    FAQs About Home Pectoral Exercises

    Q: How often should I train my chest at home?
    A: For optimal results, train your chest 2-3 times per week with at least 48 hours between intense sessions. Beginners might start with twice weekly, while more advanced individuals can utilize a push/pull/legs split allowing for three weekly chest sessions.

    Q: Can I build a significant chest with just bodyweight exercises?
    A: Absolutely. Research shows that properly executed bodyweight exercises can recruit over 95% of chest muscle fibers. Progressive variations (like those outlined above) can stimulate hypertrophy similarly to weighted exercises.

    Q: What should I do if standard push-ups are too difficult?
    A: Start with elevated push-ups by placing your hands on a counter, sturdy chair, or wall. As strength improves, gradually decrease the elevation until you can perform standard push-ups.

    Q: How many push-ups should I be able to do?
    A: Fitness standards vary by age and gender, but a good general target is working toward 20-25 consecutive push-ups with proper form. Focus on quality over quantity initially.

    Q: Will chest exercises help reduce “man boobs”?
    A: If excess chest tissue is primarily fat, chest exercises alone won’t solve the issue – you’ll need to combine them with overall fat loss strategies including nutrition and cardio. If the issue is underdeveloped muscles, targeted chest training will definitely help improve appearance.

    Q: How long before I see results from home chest workouts?
    A: With consistent training 2-3 times weekly, most people notice improved strength within 2-3 weeks and visible muscle changes within 6-8 weeks. Factors like nutrition, recovery, and initial fitness level affect individual results.

    Q: Can women benefit from these same chest exercises?
    A: Absolutely. These exercises benefit all genders equally by improving functional strength, posture, and muscle tone. Women naturally have less testosterone, so developing a “bulky” chest is not a concern for most female athletes.

  • Strength Training for Beginners: Key Exercises & Tips

    Strength Training for Beginners: Key Exercises & Tips

    Did you know that incorporating Strength Training into your routine can decrease your risk of all-cause mortality by as much as 10-17%? While cardio often steals the spotlight, building muscle through Strength Training offers a powerful foundation for long-term health and fitness, especially for beginners navigate the world of working out. If you’ve ever felt intimidated by weights or unsure where to start, you’re not alone. This is a common hurdle, but one that is easily overcome with the right guidance.

    Strength Training isn’t just for bodybuilders; it’s for everyone looking to improve their physical well-being, boost their metabolism, and gain confidence. This comprehensive guide is designed to demystify Strength Training for beginners, providing you with the essential knowledge and actionable steps to begin your journey safely and effectively. We’ll cover fundamental concepts, key exercises, crucial safety tips, and how to build a sustainable habit, tailored specifically for you, the newcomer to the weight room. Let’s dive in and discover the incredible benefits waiting for you.

    Key Concepts


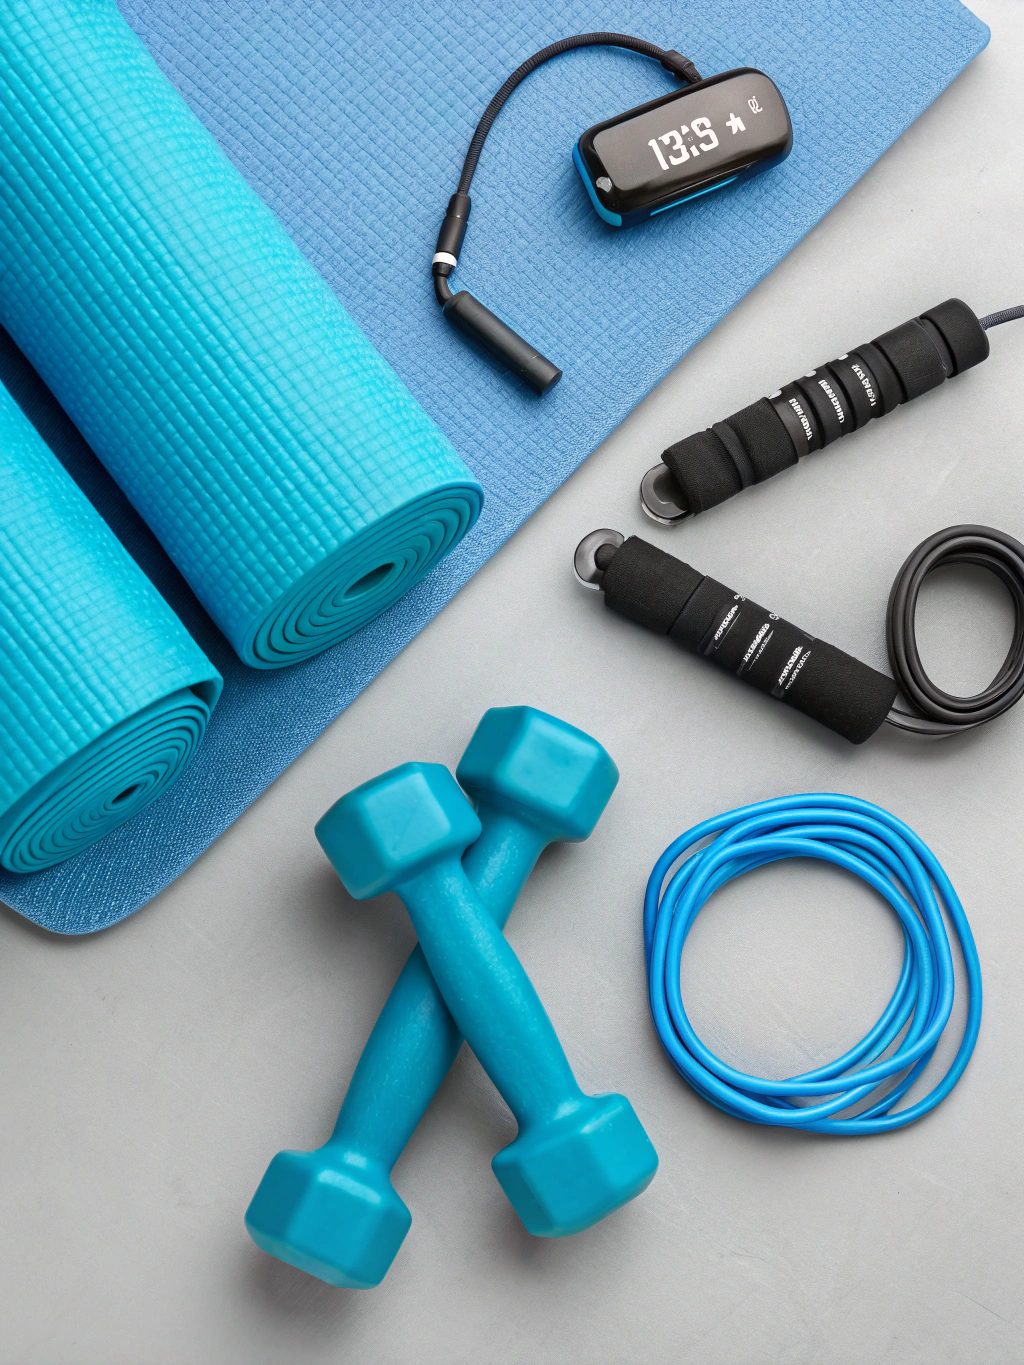
    Understanding the basic principles of Strength Training is crucial for a successful start. At its core, Strength Training involves using resistance to build muscular strength, endurance, and size. This resistance can come from various sources, including your own body weight, free weights (dumbbells, barbells), resistance bands, and weight machines.

    The magic happens when you challenge your muscles. During a Strength Training exercise, you create microscopic tears in your muscle fibers. As your body repairs these tears, the muscle fibers become stronger and sometimes larger (a process called hypertrophy). This adaptation is what leads to increased strength and improved muscle tone.

    Here are some key concepts to grasp:

    • Repetitions (Reps): The number of times you perform a specific exercise movement.
    • Sets: A group of repetitions performed consecutively. For example, 3 sets of 10 reps means you perform the movement 10 times, rest, and repeat two more times.
    • Volume: The total amount of work performed, often calculated by sets x reps x weight.
    • Progressive Overload: The principle of consistently challenging your muscles by gradually increasing the weight, repetitions, sets, or difficulty of exercises over time. This is essential for continued progress.
    • Form over Weight: Prioritizing correct technique is paramount to avoid injuries and maximize the effectiveness of each exercise. Lifting too much weight with poor form is counterproductive and dangerous.
    • Rest and Recovery: Your muscles grow stronger during rest, not during the workout. Adequate rest between sets, workouts, and days off allows your muscles to repair and rebuild. Overtraining can lead to fatigue, decreased performance, and injury.

    Think of your body like a building. Strength Training is the process of reinforcing and expanding the structural integrity of that building (your muscles). Each rep and set is like adding more bricks and mortar, making the structure more resilient and powerful. By understanding these fundamental building blocks, you’re setting yourself up for a safe and effective Strength Training journey.

    Training Schedule & Duration

    Starting Strength Training as a beginner doesn’t mean spending hours in the gym every day. Consistency and proper recovery are far more important than excessive volume early on. For most beginners, incorporating 2-3 Strength Training sessions per week is a fantastic starting point. This allows your muscles ample time to recover and grow between workouts.

    These sessions don’t need to be marathon endeavors. A focused Strength Training workout for a beginner can typically be completed within 45-60 minutes, including a warm-up and cool-down. This is approximately equivalent to a brisk walk followed by some stretching, making it highly manageable for a busy schedule. In fact, this duration is often 20% less time than the average fitness activity people attempt to start, making it more sustainable.

    Here’s a sample beginner Strength Training schedule:

    Notice the emphasis on rest days. These days are just as crucial as your workout days. They are when your muscles repair and rebuild. Overtraining can hinder progress and increase the risk of injury. Pay attention to how your body feels. If you’re feeling excessively sore or fatigued, take an extra rest day.

    The duration of your workout will depend on your exercises, sets, and rest periods. Aim for 60-90 seconds of rest between sets for most exercises as a beginner. As you progress and lift heavier, you might need slightly longer rest periods. Remember, listen to your body!

    Step-by-Step Guide

    Ready to lift? This step-by-step guide will walk you through a foundational full-body Strength Training routine perfect for beginners. Remember to warm up with 5-10 minutes of light cardio (like jogging in place or jumping jacks) and dynamic stretching before starting.

    Step 1: Bodyweight Squats

    Squats are a fundamental movement that works your lower body and core. They mimic the natural motion of sitting down and standing up.

    • How to: Stand with your feet shoulder-width apart. Keep your chest up, core engaged, and back straight. Push your hips back as if sitting into a chair, bending your knees. Lower until your thighs are parallel to the floor (or as low as is comfortable with good form). Push through your heels to stand back up, squeezing your glutes at the top.
    • Tips: Imagine a string pulling you up from the top of your head. Keep your knees tracking over your toes, not collapsing inward. Aim for 3 sets of 10-12 repetitions.

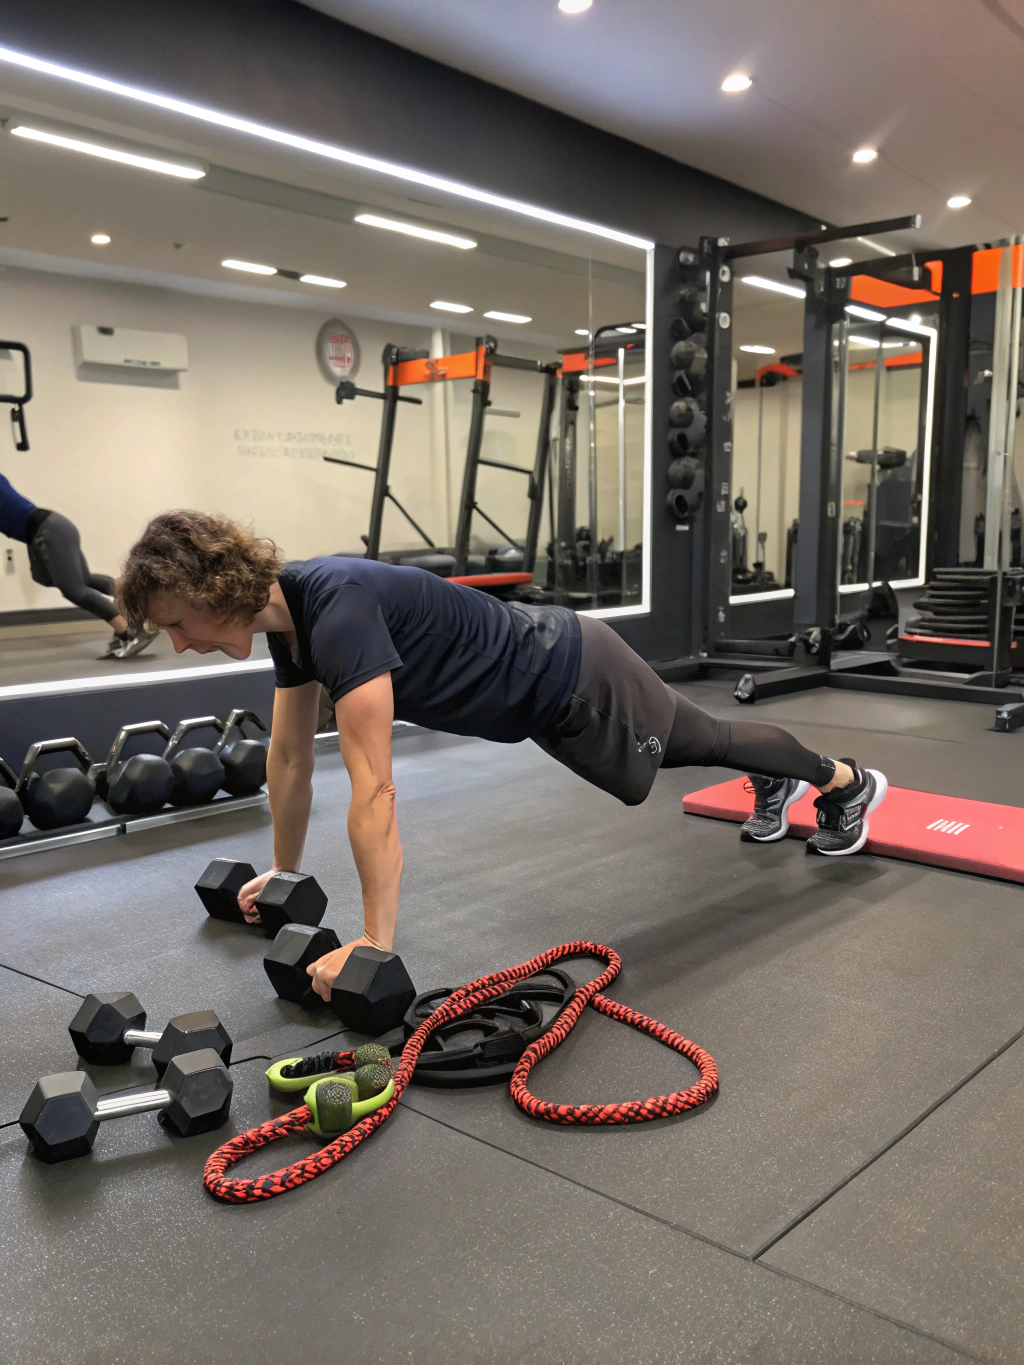
    Step 2: Push-Ups (Modified or Full)

    Push-ups are excellent for building upper body strength (chest, shoulders, triceps) and core stability.

    • How to: Start in a plank position with your hands slightly wider than shoulder-width apart. Keep your body in a straight line from head to heels. Lower your chest towards the floor by bending your elbows, keeping them tucked slightly towards your body. Push back up to the starting position.
    • Tips: If full push-ups are too challenging, start on your knees. Ensure your body maintains a straight line from head to knees. If a full push-up is comfortable, aim for 3 sets of as many repetitions as you can with good form, focusing on controlled movement.

    Step 3: Bodyweight Lunges

    Lunges target your quadriceps, hamstrings, and glutes, improving balance and unilateral (single-leg) strength.

    • How to: Stand with your feet together. Step forward with one leg, lowering your body until your front knee is bent at a 90-degree angle and your back knee is close to the floor. Ensure your front knee is directly over your ankle and your back knee isn’t touching the ground. Push off your front foot to return to the starting position. Repeat on the other leg.
    • Tips: Keep your torso upright and core engaged. Avoid letting your front knee go past your toes. Aim for 3 sets of 10-12 repetitions per leg.
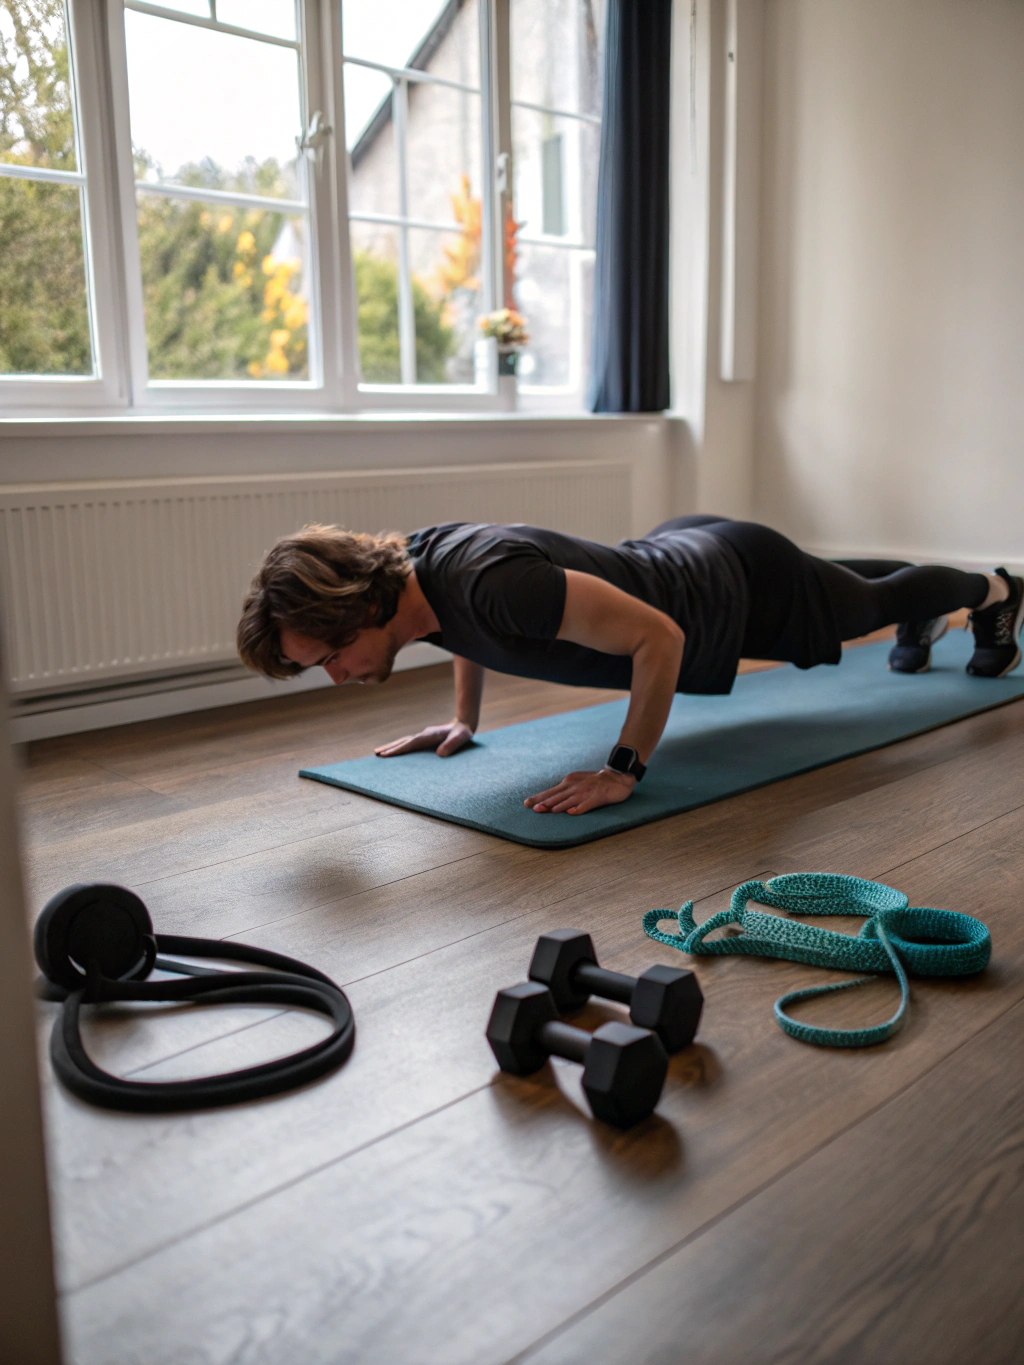
    Step 4: Plank

    The plank is a fantastic exercise for strengthening your core muscles, which are essential for stability in all your movements.

    • How to: Start on your forearms and toes, with your elbows directly beneath your shoulders. Keep your body in a straight line from head to heels, engaging your abdominal muscles. Avoid letting your hips sag or rise too high.
    • Tips: Imagine pulling your belly button towards your spine. Hold for as long as you can with good form, aiming for 3 sets of 30-60 second holds. If needed, start on your knees and progress from there.

    Step 5: Glute Bridges

    Glute bridges are excellent for activating and strengthening your glutes and hamstrings.

    • How to: Lie on your back with your knees bent and feet flat on the floor, hip-width apart. Your heels should be a few inches away from your glutes. Engage your core and glutes and lift your hips off the floor, creating a straight line from your shoulders to your knees. Squeeze your glutes at the top. Lower your hips back down with control.
    • Tips: Avoid arching your lower back at the top of the movement. Focus on squeezing your glutes to initiate the movement. Aim for 3 sets of 12-15 repetitions.

    Step 6: Cool-Down

    After your workout, spend 5-10 minutes on static stretching to help improve flexibility and reduce muscle soreness. Hold each stretch for 20-30 seconds. Focus on the muscles you worked: quads, hamstrings, chest, triceps, and glutes.

    Consistency is key! Stick to this routine 2-3 times a week, and as you get stronger, you can gradually increase the repetitions, sets, or explore variations of these exercises or introduce light weights.

    Fueling Your Body for Fitness

    Just as a car needs the right fuel to run efficiently, your body needs proper nutrition to support your Strength Training efforts. What you eat plays a crucial role in providing energy for your workouts, repairing muscle tissue, and facilitating growth.

    Think of nutrition as the building materials your body uses to construct stronger muscles. Without adequate materials, the construction process (muscle repair and growth) will be hindered.

    Here are the key nutritional components to focus on:

    • Protein: This is the cornerstone of muscle repair and growth. Aim for about 0.7-1 gram of protein per pound of body weight per day. Good sources include lean meats, poultry, fish, eggs, dairy, legumes, and tofu. For example, a 150-pound beginner would aim for 105-150 grams of protein daily. Consuming protein within a few hours after your workout can be particularly beneficial for muscle recovery, research indicates.
    • Carbohydrates: These are your body’s primary source of energy. They fuel your workouts and replenish glycogen stores in your muscles. Focus on complex carbohydrates like whole grains, fruits, vegetables, and legumes. These provide sustained energy throughout the day and for your training sessions. Aim to consume carbohydrates before your workout for energy and after your workout to aid recovery.
    • Healthy Fats: Essential for hormone production, nutrient absorption, and overall health. Include sources like avocados, nuts, seeds, olive oil, and fatty fish. Contrary to outdated beliefs, healthy fats do not make you fat; they are vital for numerous bodily functions that support your fitness goals.
    • Hydration: Staying well-hydrated is non-negotiable. Dehydration can impair performance, increase the risk of cramps, and hinder recovery. Drink plenty of water throughout the day, especially before, during, and after your workouts.

    Don’t overthink it initially. Focus on incorporating balanced meals containing protein, carbohydrates, and healthy fats. Listen to your body’s hunger cues and eat until you’re satisfied, not overly full. As you gain experience with Strength Training, you might explore more specific timing of macronutrient intake, but for beginners, consistency with overall healthy eating is the most important factor.

    Modifications and Variations

    The beauty of Strength Training is its adaptability. As a beginner, it’s essential to find exercises that you can perform safely and effectively. The exercises listed in the step-by-step guide are foundational, but you can modify them or find variations to suit your current fitness level and any physical limitations. This personalization makes Strength Training accessible to almost everyone.

    Think of modifications as adjusting the difficulty of an exercise. If a full push-up is too challenging, dropping to your knees is a perfect modification that still allows you to work the same muscle groups. If bodyweight squats are too easy, you can hold a light weight (like a water bottle or a book) to add resistance.

    Here are some examples of modifications and variations for the beginner exercises:

    • Squats:
      • Modification: Wall sits (leaning your back against a wall and lowering into a seated position) are great for building leg endurance without the full range of motion. Chair squats (squatting down to tap a chair with your glutes) can help with depth and control.
      • Variation: Goblet squats (holding a weight at your chest) add resistance and help reinforce good form.
    • Push-Ups:
      • Modification: Incline push-ups (performing push-ups against a counter or wall) reduce the amount of body weight you’re pushing. Starting on your knees, as mentioned, is a common and effective modification.
      • Variation: As you get stronger, try elevating your feet (decline push-ups) to increase the difficulty.
    • Lunges:
      • Modification: Stationary lunges (stepping forward and backward from a fixed position) can help with balance before attempting walking lunges. Holding onto a wall or chair for support can also be helpful initially.
      • Variation: Side lunges target different muscles and improve lateral movement.
    • Plank:
      • Modification: Performing the plank on your knees is a common starting point.
      • Variation: Side planks work your oblique muscles and challenge core stability from a different angle.
    • Glute Bridges:
      • Modification: Single-leg glute bridges increase the challenge on each hip individually.
      • Variation: Adding a resistance band around your knees during glute bridges can increase glute activation.

    Don’t be afraid to experiment and find what works best for your body. The goal is to challenge yourself safely. If an exercise causes pain, stop and consult with a healthcare professional or certified fitness trainer. As a beginner, remember that consistency and correct form are far more important than lifting heavy weights or performing complex variations. Focus on mastering the basic movements first, and then gradually explore modifications and variations as you get stronger.

    Incorporating Fitness into Your Lifestyle

    Making Strength Training a consistent part of your life is about more than just the hours you spend lifting; it’s about integrating movement and health-conscious decisions into your daily routine. It’s not about a sudden overhaul, but rather small, sustainable changes that build momentum and make fitness feel like a natural extension of who you are. For many beginners, the biggest hurdle isn’t the workout itself, but finding the time and motivation to start.

    Here are some creative and appealing suggestions for weaving Strength Training into your lifestyle:

    • Schedule it like an appointment: Put your workout times in your calendar and treat them with the same importance you would a doctor’s visit or a work meeting. This simple act of scheduling can significantly increase your likelihood of following through.
    • Find a workout buddy: Exercising with a friend or family member can make it more enjoyable and provide accountability. Plus, you can motivate each other on challenging days!
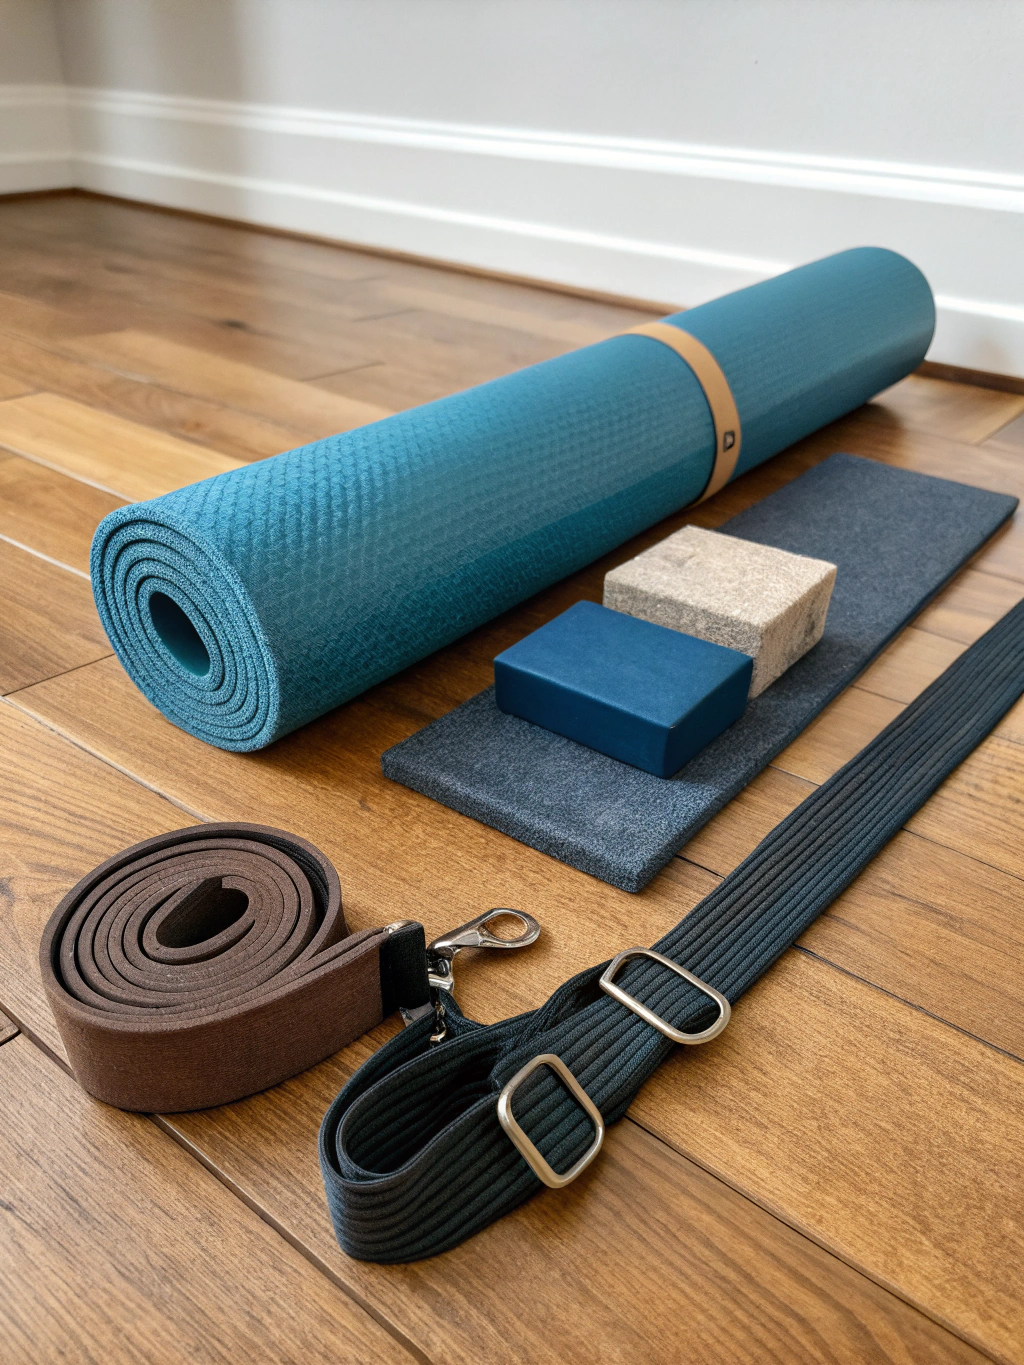
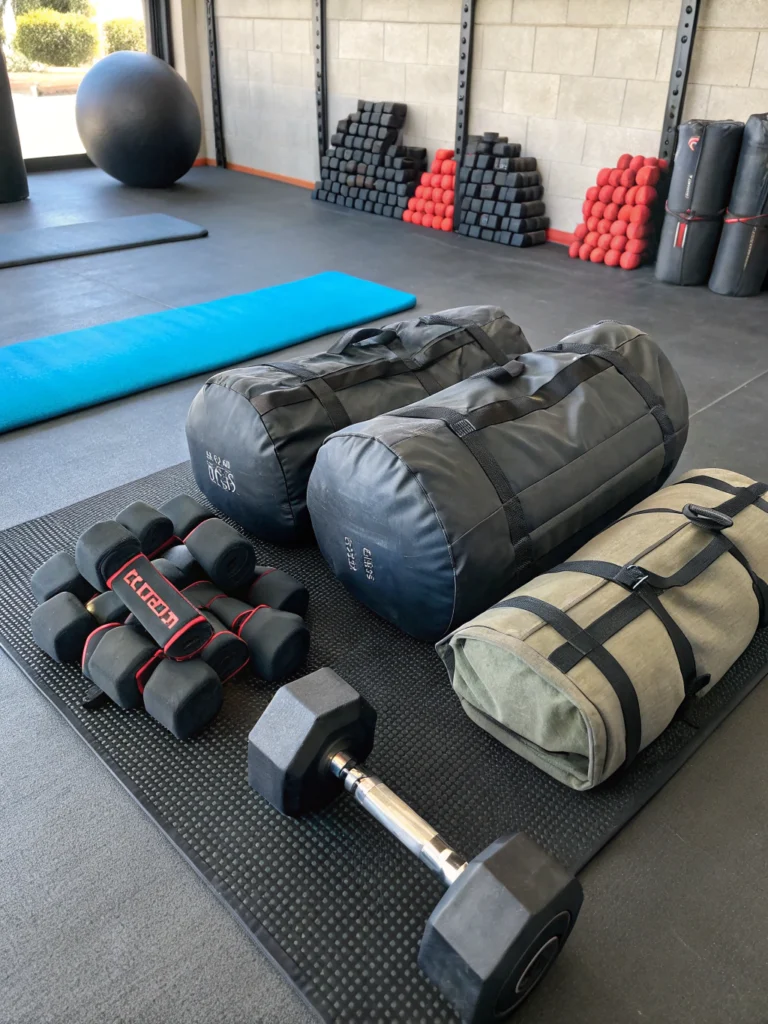
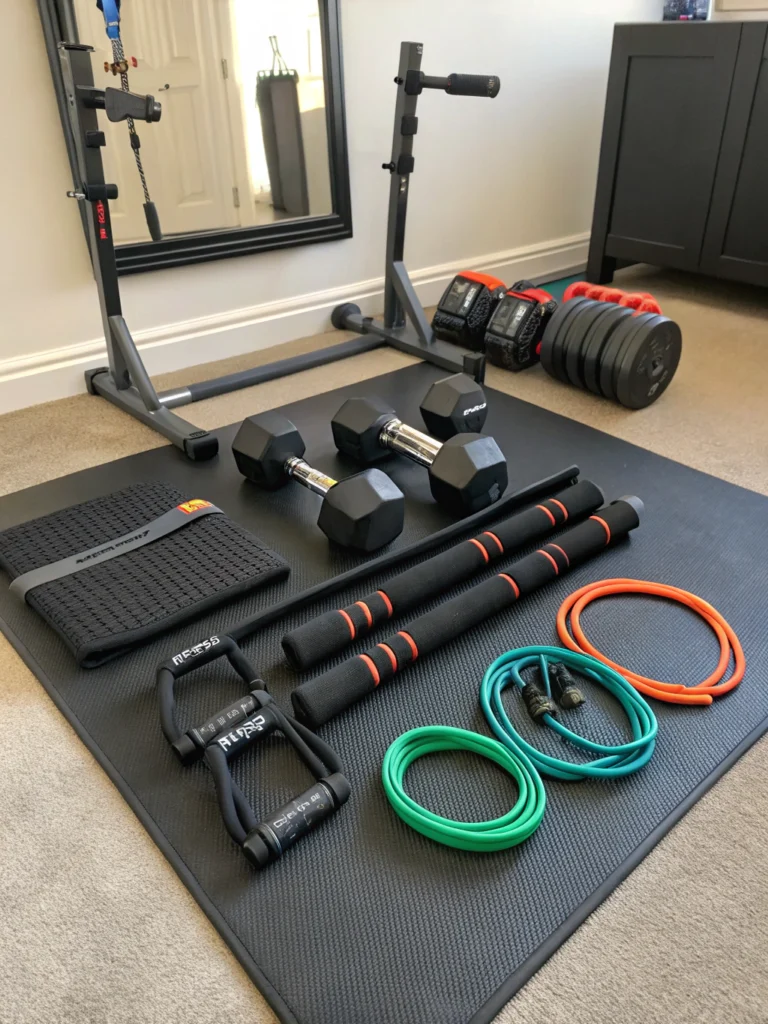
    • Create a dedicated workout space: Having a small area in your home where you keep your exercise equipment (even just a mat and some resistance bands) can make it easier to get started quickly.
    • Workout in the morning: Many people find that exercising first thing in the morning helps them feel more energized throughout the day and reduces the chances of skipping a workout later due to fatigue or other commitments.
    • Break it up: Can’t commit to a full 45-minute session? Break your workout into shorter segments throughout the day. For example, do your squats and push-ups in the morning and your lunges and planks later in the day. Even 10-15 minutes of focused movement can make a difference.
    • Listen to a podcast or audiobook: Distract yourself during your workout by immersing yourself in a captivating story or educational content.
    • Reward yourself: After hitting a workout milestone or sticking to your schedule for a week, treat yourself (in a healthy way, of course!) to something you enjoy. This positive reinforcement can help solidify the habit.
    • Connect with your “why”: Remind yourself why you started Strength Training. Is it to feel stronger? Have more energy? Improve your health markers? Remembering your motivation can help you stay committed when things get tough.

    Personalization is key here. Think about your daily routine, your preferences, and what truly motivates you. If you’re a morning person, schedule those workouts early. If you thrive on social interaction, join a group fitness class or find a training partner. The goal is to make Strength Training something you want to do, not something you feel obligated to do. By consciously integrating these habits, you’re not just working out; you’re building a healthier, stronger lifestyle.

    Avoiding Common Fitness Mistakes

    As a beginner stepping into the world of Strength Training, you’re bound to encounter some common pitfalls. Recognizing and avoiding these mistakes early on will save you frustration, prevent injuries, and accelerate your progress. Think of these as learning curves that every newcomer navigates.

    Data from fitness studies consistently shows that beginners who prioritize form and gradual progression experience fewer injuries and sustain their fitness journeys longer than those who try to do too much, too soon. For instance, a recent survey indicated that over 60% of beginner weightlifters reported some form of discomfort or minor injury in their first six months, often linked to poor form or excessive volume.

    Here are some common fitness mistakes to avoid:

    • Ignoring Warm-Up and Cool-Down: Skipping these crucial steps is a direct pathway to injury and increased soreness. A proper warm-up prepares your muscles for activity, and a cool-down helps with recovery and flexibility.
    • Using Improper Form: This is arguably the most critical mistake. Lifting with poor form not only reduces the effectiveness of the exercise but significantly increases the risk of injury. It’s far better to use lighter weight with perfect form than to struggle with heavy weight and bad technique. Watch videos, read descriptions, or even consider a session with a certified trainer to learn proper form.
    • Lifting Too Heavy Too Soon: The temptation to lift heavy is understandable, but it’s a recipe for disaster for beginners. Your muscles, joints, and connective tissues need time to adapt. Start with lighter weights and focus on mastering the movement pattern before gradually increasing the load. Progressive overload is key, but it should be gradual.
    • Not Resting Enough: Overtraining can lead to fatigue, decreased performance, and make you more susceptible to injury. Muscle growth happens during rest. Ensure you’re getting enough sleep and taking rest days between Strength Training sessions.
    • Comparing Yourself to Others: Everyone is on their own fitness journey. Don’t get discouraged by comparing your progress to someone who has been training for years. Focus on your own improvements, celebrate small victories, and remember that consistency is more important than speed.
    • Neglecting Nutrition and Hydration: As discussed earlier, proper fueling is essential for muscle growth and recovery. Don’t sabotage your efforts in the gym by neglecting your diet and hydration outside of it.
    • Doing the Same Routine Constantly: While consistency with your schedule is important, your muscles need new challenges to continue adapting. As you get stronger, you’ll need to introduce variations, increase weight, or change exercises to continue progressing (progressive overload).
    • Not Listening to Your Body: If something feels like a sharp pain, stop. There’s a difference between muscle fatigue and injury pain. Learn to differentiate and don’t push through pain that could lead to a more serious issue.

    By being mindful of these common mistakes, you can navigate your beginner Strength Training journey more effectively, safely, and enjoyably. Prioritize learning, listen to your body, and be patient with your progress.

    Maintaining Consistency

    Consistency is the secret sauce of successful Strength Training. It’s not about being perfect every day, but about showing up regularly and making it a sustainable habit. Think of consistency as planting seeds; it takes time and consistent effort for them to grow into a strong, thriving plant (your fitness level). According to numerous fitness studies, individuals who adhere to a regular exercise program for at least six months are significantly more likely to continue exercising long-term.

    Here’s some practical advice on staying consistent with your Strength Training routine and building long-term adherence:

    • Set Realistic Goals: Don’t aim to be an Olympic weightlifter in your first month. Set small, achievable goals that build confidence and motivation. Maybe it’s consistently completing three workouts a week for a month, or being able to do 10 unassisted push-ups.
    • Find Your Motivation (and Revisit It): Why did you start Strength Training? Keep that reason at the forefront of your mind. Write it down, put it somewhere visible, and revisit it on days you feel unmotivated.
    • Track Your Progress: Seeing how far you’ve come can be incredibly motivating. Use a journal, a fitness app, or simply make notes on your phone to track your exercises, sets, reps, and weight. Celebrating those improvements, no matter how small, reinforces the positive habit.
    • Be Flexible: Life happens. You’ll miss a workout sometimes, and that’s okay. Don’t let one missed session derail your entire routine. Simply pick up where you left off on your next scheduled workout. Flexibility and self-compassion are key.
    • Make it Enjoyable: If you dread your workouts, you’re less likely to stick with them. Experiment with different exercises, workout environments (gym, home, park), music, or workout buddies to find what you enjoy.
    • Prepare in Advance: Pack your gym bag the night before, lay out your workout clothes, or prepare your post-workout meal. Removing any barriers to getting started can make a significant difference.
    • Listen to Your Body: As mentioned before, rest and recovery are crucial. Don’t be afraid to take an extra rest day or modify a workout if you’re feeling excessively fatigued or sore. Pushing through when your body is telling you no can lead to burnout and injury.
    • Celebrate Your Milestones: Acknowledging your progress, big or small, is vital for motivation. Did you add a rep? Lift a little heavier? Or simply feel stronger? Pat yourself on the back and recognize your consistent effort.

    Building a consistent Strength Training habit takes time and effort, but the rewards are immense – not just in physical strength, but in increased energy, confidence, and overall well-being. By implementing these best practices, you’re setting yourself up for long-term success and making Strength Training a positive and integrated part of your life.

    Conclusion

    Stepping into the world of Strength Training as a beginner is a powerful decision that can profoundly impact your health, confidence, and quality of life. We’ve explored the fundamental concepts, a simple yet effective beginner routine, the importance of fueling your body correctly, how to adapt exercises to your needs, strategies for integrating fitness into your daily life, and crucial mistakes to avoid. Remember, it’s not about perfection, it’s about progress. Every rep, every set, and every consistent workout builds upon the last, forging a stronger, more resilient you.

    Think of this guide as your starting block. You have the knowledge, the basic tools, and the understanding to begin your Strength Training journey safely and effectively. By prioritizing proper form, listening to your body, fueling yourself well, and embracing consistency, you’re setting yourself up for sustainable success.

    Ready to experience the empowering benefits of Strength Training for yourself? Take the first step today! Try out the beginner routine we outlined or adapt it to fit your current capabilities. Share your initial experiences in the comments below – what exercises did you try? How did you feel? Your journey can inspire others!

    For more fitness insights, workout guides, and tips on maintaining a healthy lifestyle, explore our other articles in the Fitness Category. Keep learning, keep moving, and keep getting stronger!

    FAQs

    Here are some common questions beginners often ask about Strength Training:

    Q: How long will it take to see results from
    Strength Training?

    A: You can often start feeling stronger within a few weeks of consistent Strength Training. Visible changes in muscle tone and size typically take 8-12 weeks, depending on factors like consistency, nutrition, and genetics. Be patient and stay committed!

    Q: Do I need to join a gym to do Strength Training?

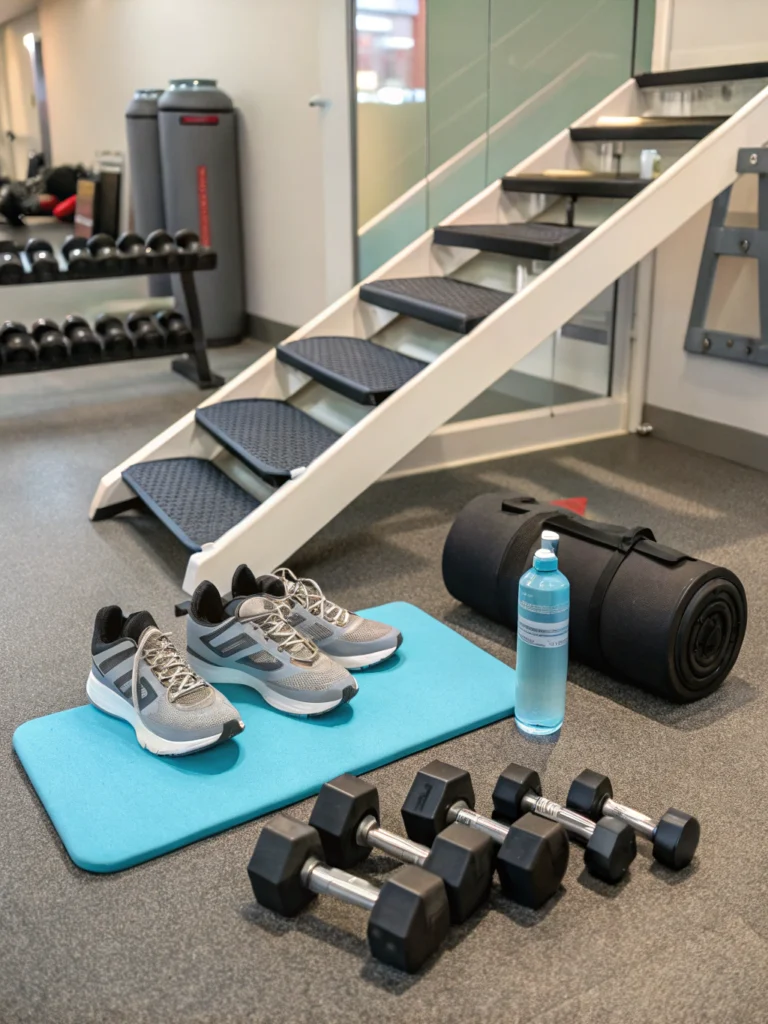
    A: Absolutely not! While gyms offer a wide range of equipment, you can get a fantastic beginner Strength Training workout using just your body weight, as demonstrated in our step-by-step guide. As you progress, you might consider investing in some affordable dumbbells, resistance bands, or kettlebells for home workouts.

    Q: Will Strength Training make me “bulky”?

    A: This is a common misconception, especially for women. Building significant muscle mass requires specific training methods, high training volume, and often a focused diet aimed at hypertrophy. For most beginners and those focusing on general fitness, Strength Training will lead to increased strength, improved muscle tone, and a leaner physique, not excessive bulkiness

    Q: How much weight should I lift?

    A: As a beginner, focus on mastering the form of each exercise with little to no weight initially. Once your form is solid, start with a weight that allows you to complete the recommended number of repetitions (10-12 for most beginner exercises) with good form, but feel challenged by the last few reps. Use the principle of progressive overload to gradually increase the weight as you get stronger.

    Q: What should I eat before and after a Strength Training workout?

    A: Before your workout (1-2 hours prior), focus on a meal or snack containing complex carbohydrates for energy (like oats, whole-wheat toast, or fruit). After your workout (within a few hours), consume a meal or snack with protein and carbohydrates to aid in muscle repair and recovery (like chicken and rice, Greek yogurt with fruit, or a protein smoothie). Hydration is also key throughout the day.

    Q: Is it okay to be sore after a Strength Training workout?

    A: Yes, mild to moderate muscle soreness (Delayed Onset Muscle Soreness or DOMS) is common after Strength Training workouts, especially when you’re new or trying new exercises. However, if you experience sharp or intense pain, stop and assess. Proper warm-ups, cool-downs, and rest help manage soreness.

    Q: How often should I increase the weight or difficulty of my exercises?

    A: This varies from person to person. A general guideline is to increase the weight or difficulty when you can comfortably complete the upper range of your target repetitions with good form for two consecutive workouts. This indicates your muscles are adapting and ready for a new challenge. Remember, gradual progression is key.

  • Upper Body Toning Workout: 7 Simple Moves

    Upper Body Toning Workout: 7 Simple Moves

    Do you believe you need hours in the gym or complex equipment to effectively tone your upper body? Many people do, reporting that achieving visible results feels like an overwhelming time commitment, with around 40% of individuals citing lack of time as a major barrier to fitness according to recent surveys. But what if I told you there’s a highly effective and accessible upper body toning workout that you can master with just 7 simple moves? This post is your guide to sculpting a stronger, more defined upper physique without the fuss. Get ready to tone your upper body! Master our upper body toning workout with 7 simple moves. Get fit. Discover the power of simplicity and consistency!

    Key Concepts for Upper Body Toning

    Toning your upper body isn’t just about building massive muscles; it’s about increasing muscle definition and improving overall strength and endurance. This involves a combination of resistance training, focusing on exercises that work your shoulders, arms, back, and chest. We’ll explore compound movements that engage multiple muscle groups simultaneously, making your workout more efficient. Think of it as sculpting – we’re focusing on shaping and firming those upper body muscles to reveal a leaner, more athletic look. The key is consistent challenge and proper form to effectively stimulate muscle fibers.

    Training Schedule & Duration

    For optimal results with this upper body toning workout, aim for 2-3 sessions per week, allowing at least one rest day between workouts to facilitate muscle recovery. Each session should take approximately 30-40 minutes, including warm-up and cool-down. This is significantly less time than many traditional gym workouts, offering a highly efficient approach to tone your upper body. For instance, engaging specifically in upper body resistance for 30 minutes can burn upwards of 150-300 calories, depending on intensity and individual factors, which is competitive with many longer, less focused routines. Consistency is far more impactful than duration here.

    Step-by-Step Guide: Our 7 Simple Moves

    Here’s the breakdown of our effective 7-move routine to help you tone your upper body:

    Step 1: Push-Ups (Modified or Full)

    • Action: Start in a plank position. Lower your chest towards the floor by bending your elbows, keeping your body in a straight line. Push back up to the starting position.
    • Tips: If full push-ups are too challenging, start on your knees. Focus on controlled movement and engaging your core. Aim for 3 sets of 8-12 repetitions. Personalize by adjusting the depth of your push-up.

    Step 2: Dumbbell Rows

    • Action: Hinge at your hips, keeping your back straight, and hold a dumbbell in each hand, palms facing each other. Pull the dumbbells up towards your chest, squeezing your shoulder blades together. Lower with control.
    • Tips: Choose a weight that allows you to maintain good form. Visualize pulling with your back muscles, not just your arms. 3 sets of 10-15 repetitions.

    Step 3: Overhead Press

    • Action: Stand or sit with a dumbbell in each hand at shoulder height, palms facing forward. Press the dumbbells straight up overhead, fully extending your arms. Lower slowly back to the starting position.
    • Tips: Avoid arching your back. Engage your core for stability. If using heavy weights, consider a spotter. 3 sets of 8-12 repetitions.

    Step 4: Bicep Curls

    • Action: Stand with a dumbbell in each hand, palms facing forward. Keeping your elbows close to your sides, curl the dumbbells up towards your shoulders, squeezing your biceps at the top. Lower with control.
    • Tips: Avoid swinging the weights. Focus on the mind-muscle connection with your biceps. Lighter weight and slower reps can increase the burn. 3 sets of 12-15 repetitions.

    Step 5: Tricep Dips (Using a Chair)

    • Action: Sit on the edge of a sturdy chair with your hands gripping the edge, fingers pointing forward. Slide your hips off the chair and lower your body by bending your elbows. Push back up to the starting position.
    • Tips: Keep your back close to the chair. To make it harder, extend your legs further out. Aim for 3 sets of 10-15 repetitions.

    Step 6: Lateral Raises

    • Action: Stand with a dumbbell in each hand at your sides, palms facing your body. Keeping a slight bend in your elbows, raise the dumbbells out to the sides until they reach shoulder height. Lower slowly.
    • Tips: Avoid shrugging your shoulders. Control the movement on the way down. Lighter weight with focus on form is key. 3 sets of 12-15 repetitions.

    Step 7: Plank

    • Action: Start in a push-up position, either on your hands or forearms, keeping your body in a straight line from head to heels. Engage your core and hold this position.
    • Tips: Focus on keeping your hips from sagging or raising too high. Engage as many muscles as possible. Hold for 3 sets, aiming for 30-60 seconds each.

    Fueling Your Body for Fitness

    Proper nutrition is crucial when you tone your upper body. Aim for a balanced diet rich in lean protein, complex carbohydrates, and healthy fats. Protein is essential for muscle repair and growth – consider lean meats, fish, eggs, and plant-based sources like legumes and tofu. Data suggests that adequate protein intake, often recommended at 0.8-1.2 grams per pound of body weight for active individuals, significantly enhances recovery and muscle synthesis. Complex carbs provide energy for your workouts, while healthy fats support hormone function and overall well-being. Stay well-hydrated throughout the day.

    Modifications and Variations

    This upper body toning workout can be adapted for different fitness levels. Beginners can focus on mastering the form with lighter weights or bodyweight variations (like knee push-ups or chair-assisted tricep dips). For those looking for more of a challenge, increase the weight used for dumbbell exercises, try variations like decline push-ups, or incorporate resistance bands for added tension. Get creative! You could even integrate these moves into a circuit training format for a cardio boost.

    Incorporating Fitness into Your Lifestyle

    Making this upper body toning workout a consistent part of your life is key. Try scheduling your workouts like appointments – put them in your calendar! Find an accountability partner to motivate you. Create a dedicated space in your home for your workouts. You might find it easier to stick to the plan if you associate your sessions with a relaxing post-workout ritual, like a warm shower or listening to your favorite podcast. Start small; even fitting in just 1-2 sessions initially is a win. Personalized tips based on YOUR daily routine can make all the difference in sustainability.

    Avoiding Common Fitness Mistakes

    Watch out for these common pitfalls when you tone your upper body:

    • Poor Form: Rushing through exercises with incorrect form can lead to injury and less effective muscle targeting. Prioritize quality over quantity.
    • Overtraining: Don’t do this workout every day. Muscles need rest to repair and grow. Overtraining can lead to burnout and decreased performance, with studies showing increased injury risk by up to 30% in overtrained individuals.
    • Neglecting Nutrition and Sleep: Your body builds muscle outside of the workout. Fueling and resting properly are non-negotiable.
    • Not Challenging Yourself: Once exercises become easy, increase the weight or repetitions to keep progressing.
    • Ignoring Pain: Listen to your body. Pain is a signal to stop and assess. Stiffness is normal; sharp pain is not.

    Maintaining Consistency

    Consistency is the secret sauce to achieving your goals when you want to tone your upper body. Set realistic goals – perhaps starting with just two sessions per week. Track your progress; seeing how far you’ve come is a huge motivator. Celebrate small victories! On days you lack motivation, remind yourself of your reasons for wanting to get fit. Best practices for long-term adherence include finding enjoyment in the process and integrating fitness into your existing routine rather than seeing it as a separate chore.

    Conclusion

    You now have a powerful and accessible upper body toning workout at your fingertips with just 7 simple moves! You’ve learned the key concepts, a flexible schedule, step-by-step instructions, the importance of fueling your body, how to adapt the workout, integrate it into your life, avoid common mistakes, and maintain consistency. Ready to tone your upper body? Give this workout a try and see the results for yourself. Share your experience in the comments below! Looking for more simple and effective fitness routines? Explore our other articles on home workouts!

    FAQs

    • How long will it take to see results from this upper body toning workout? Results vary based on individual factors like diet, consistency, and genetics, but many people start noticing increased definition and strength within 4-6 weeks of consistent adherence.
    • Do I need any equipment for this workout? You will need a pair of dumbbells for some exercises (rows, overhead press, biceps curls, lateral raises) and a sturdy chair for tricep dips. Push-ups and planks are bodyweight.
    • Can I add more exercises to this routine? Absolutely! Once you feel comfortable, you can gradually add other upper body exercises, but begin with mastering these 7 moves first.
    • Is this workout suitable for beginners? Yes, with the suggested modifications, this workout is suitable for beginners. Focus on learning proper form first.
    • How heavy should the dumbbells be? Choose a weight that allows you to complete the target number of repetitions with good form, but where the last few reps feel challenging. As you get stronger, gradually increase the weight.